
Corrugated Metal Panel for Interior Wall
Premium corrugated metal panels specifically engineered for interior wall applications, combining industrial aesthetic appeal with functional performance. These lightweight, versatile panels transform interior spaces with distinctive corrugated textures while providing excellent durability, easy maintenance, and design flexibility. Our interior corrugated panels offer architects and designers unlimited creative possibilities for commercial, residential, and hospitality environments.
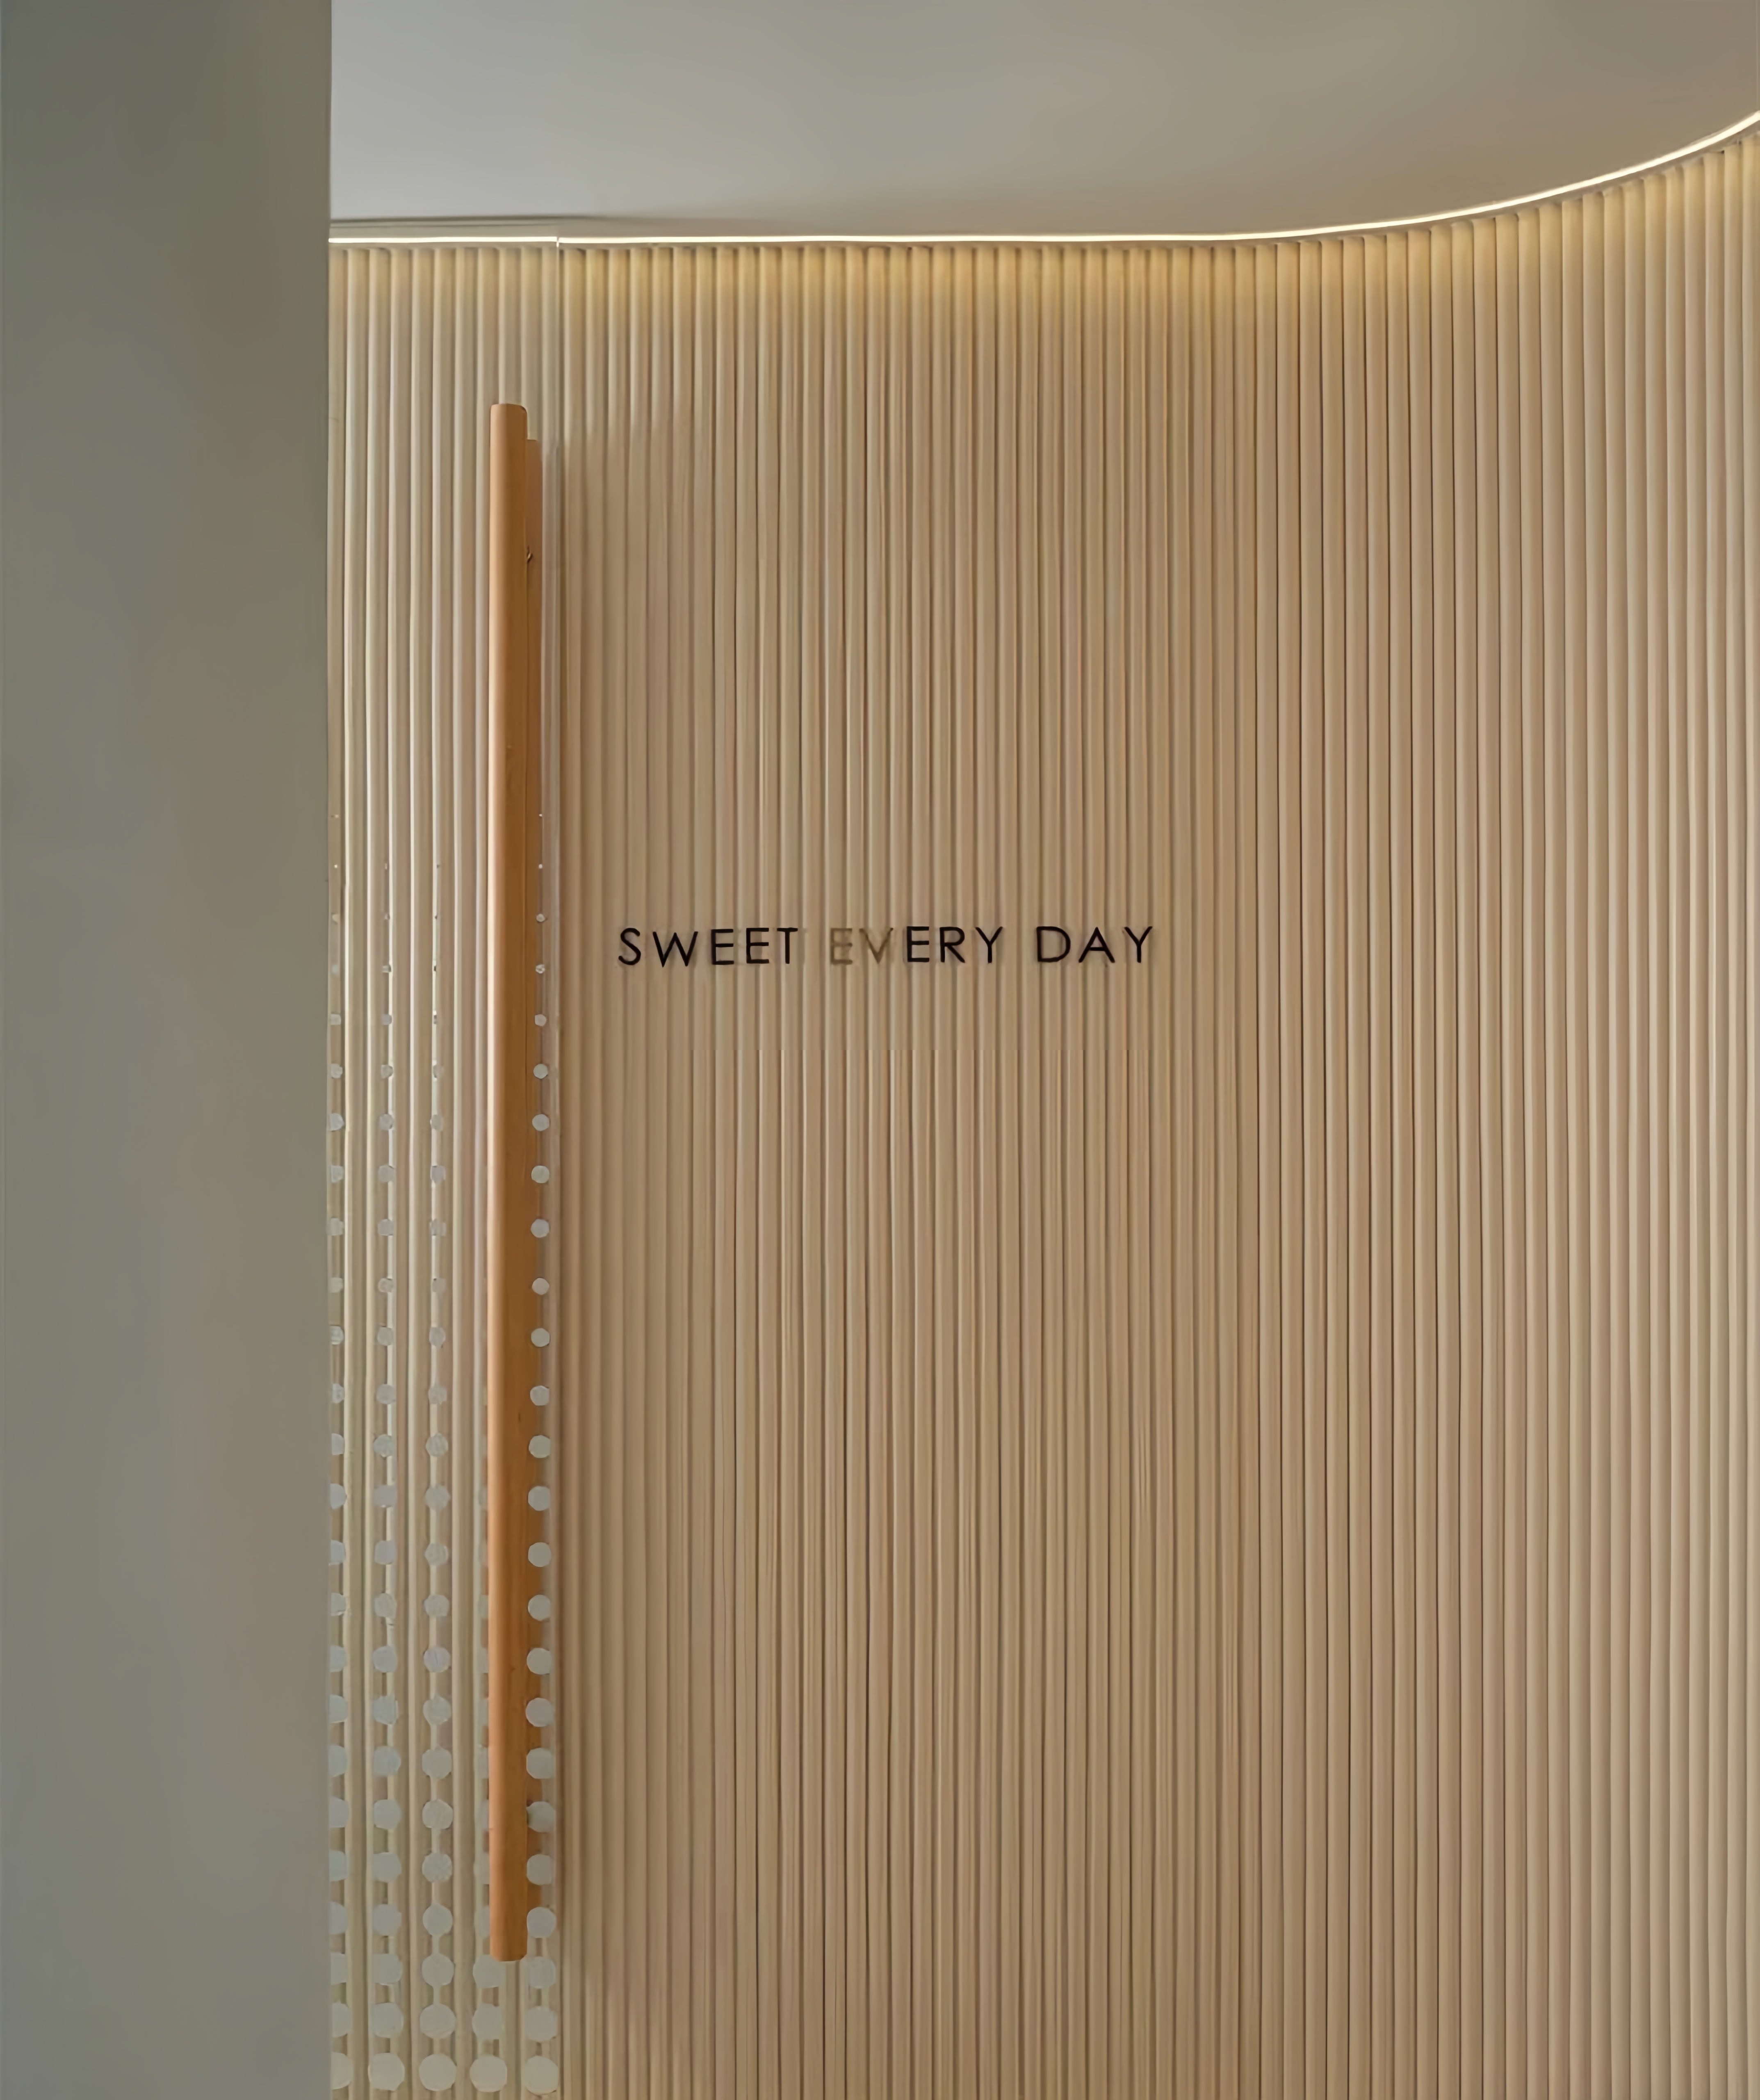
Our corrugated metal panels bring a dynamic blend of industrial texture and refined style, transforming interior spaces with character and depth.
- Retail & Hospitality Environments: Create bold feature walls, bar fronts, and wainscoting in restaurants, hotels, and boutiques to establish a memorable atmosphere.
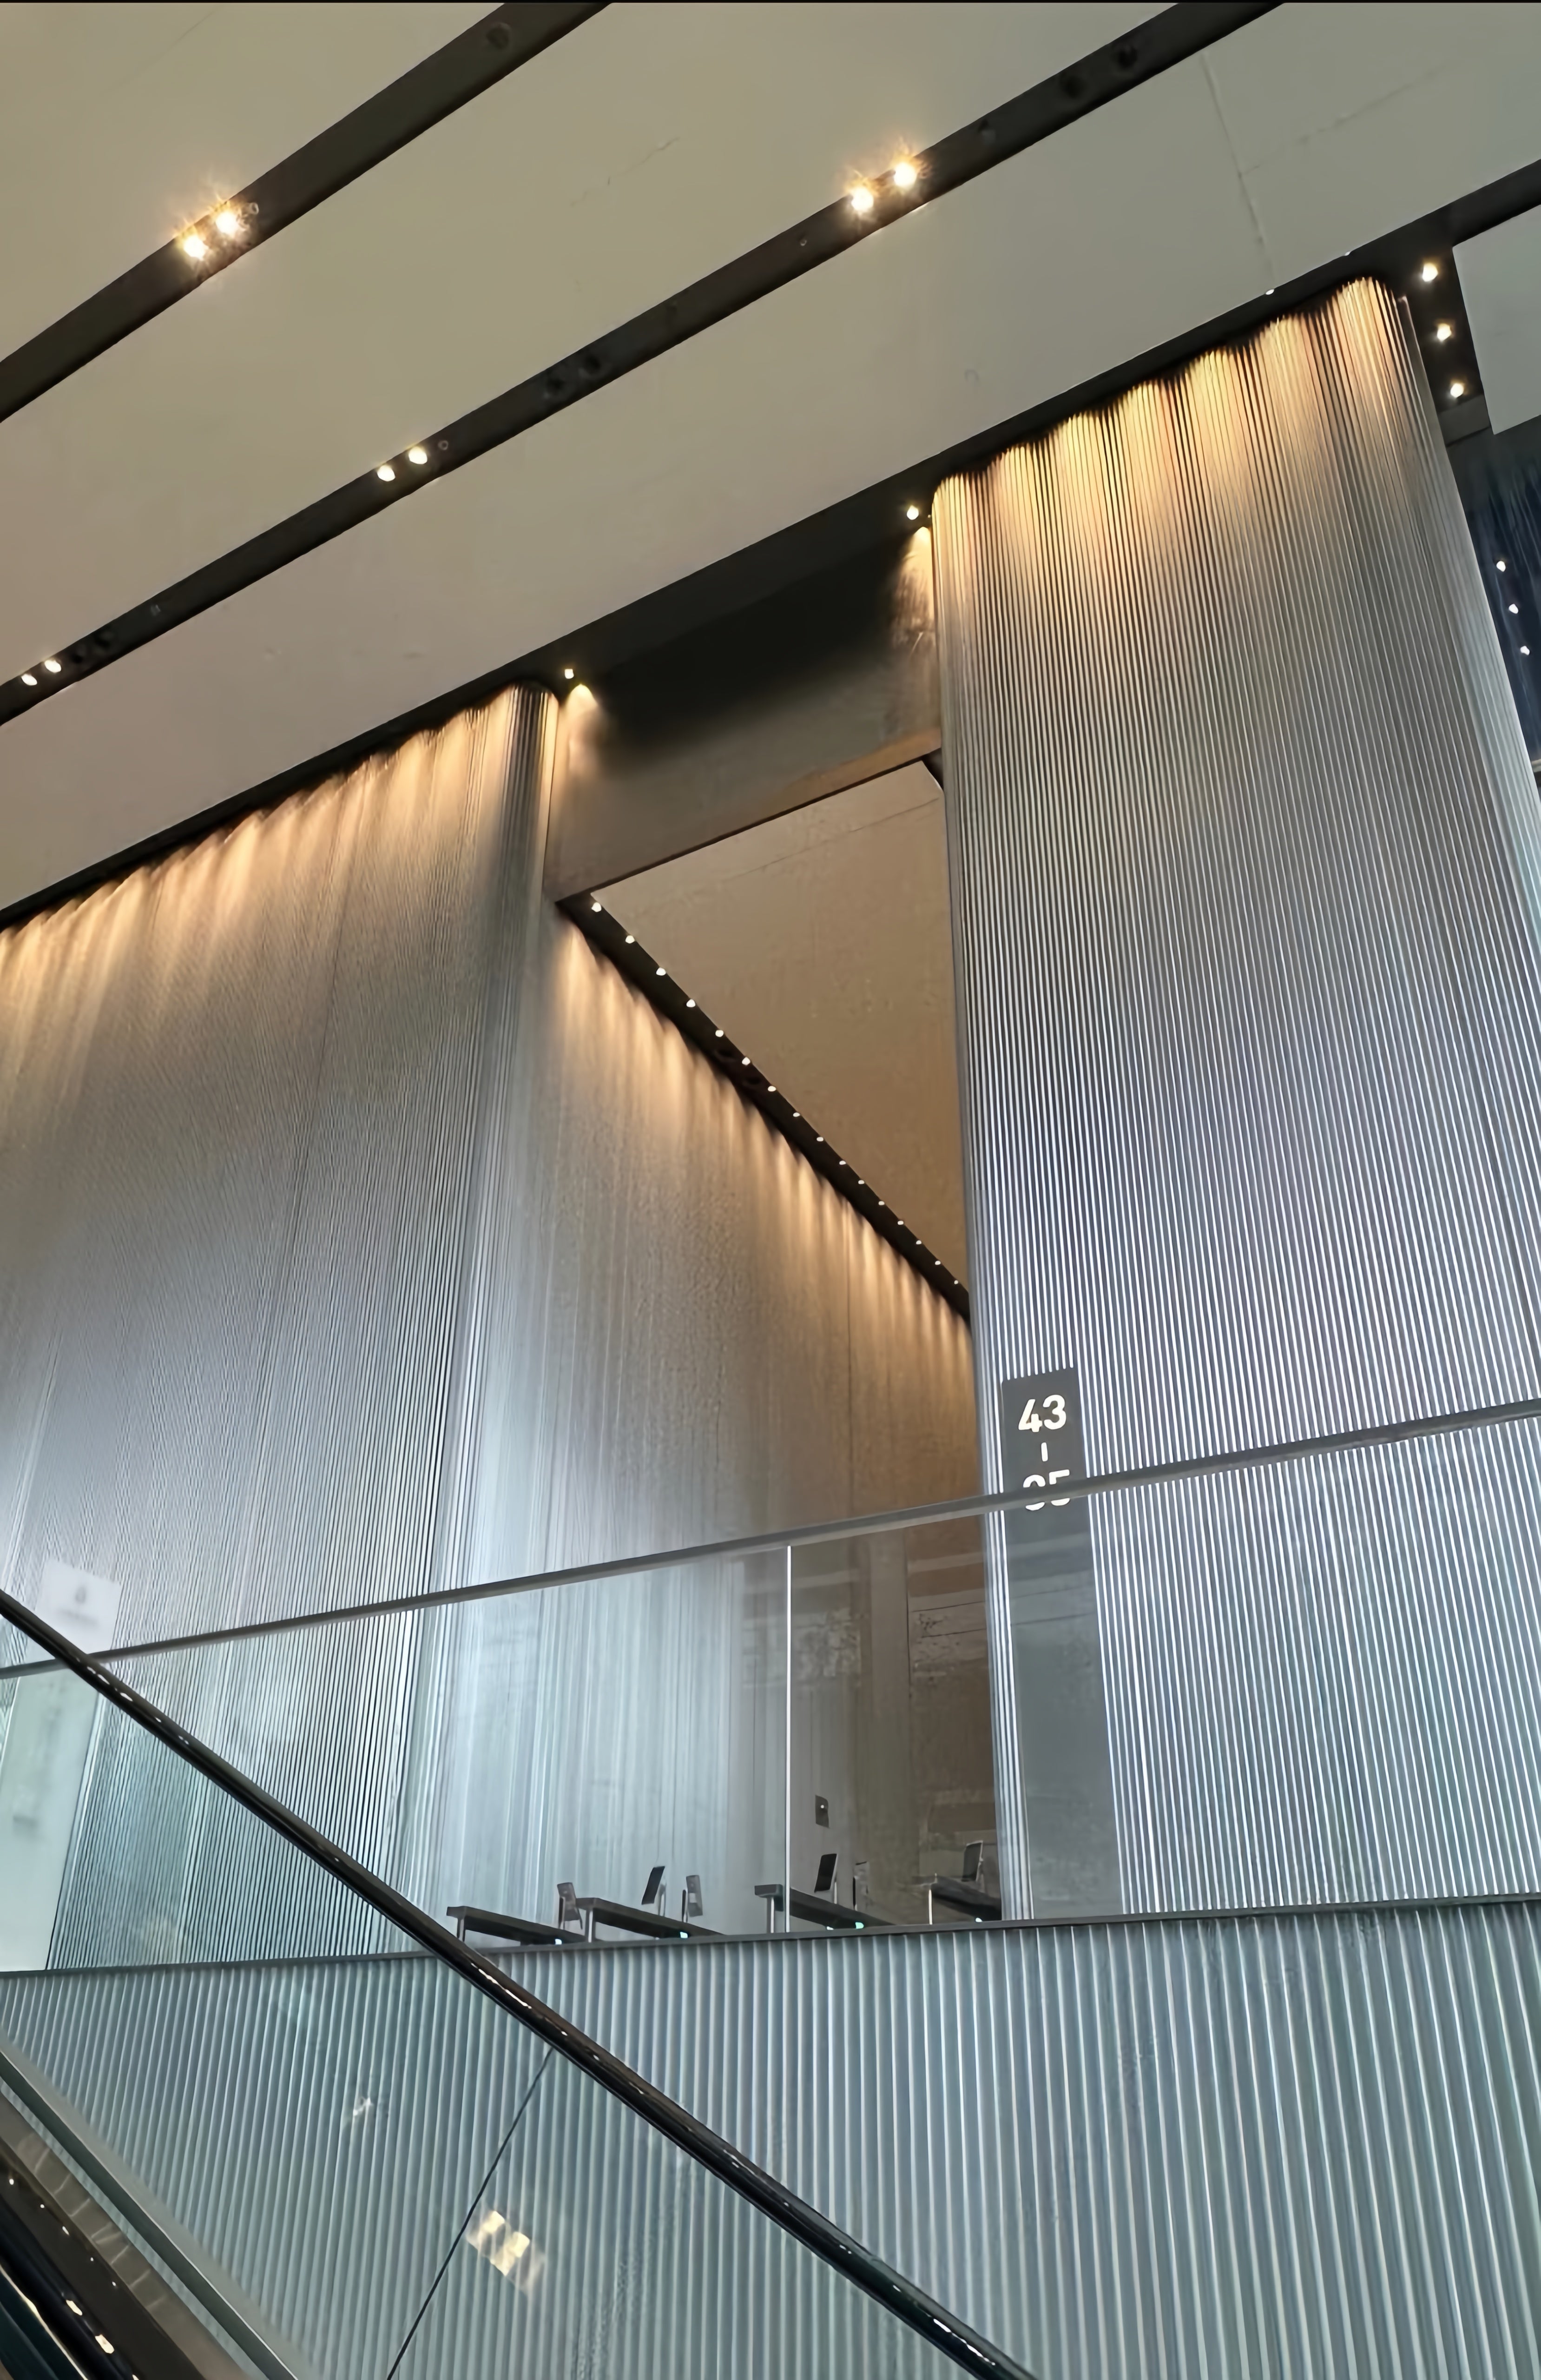
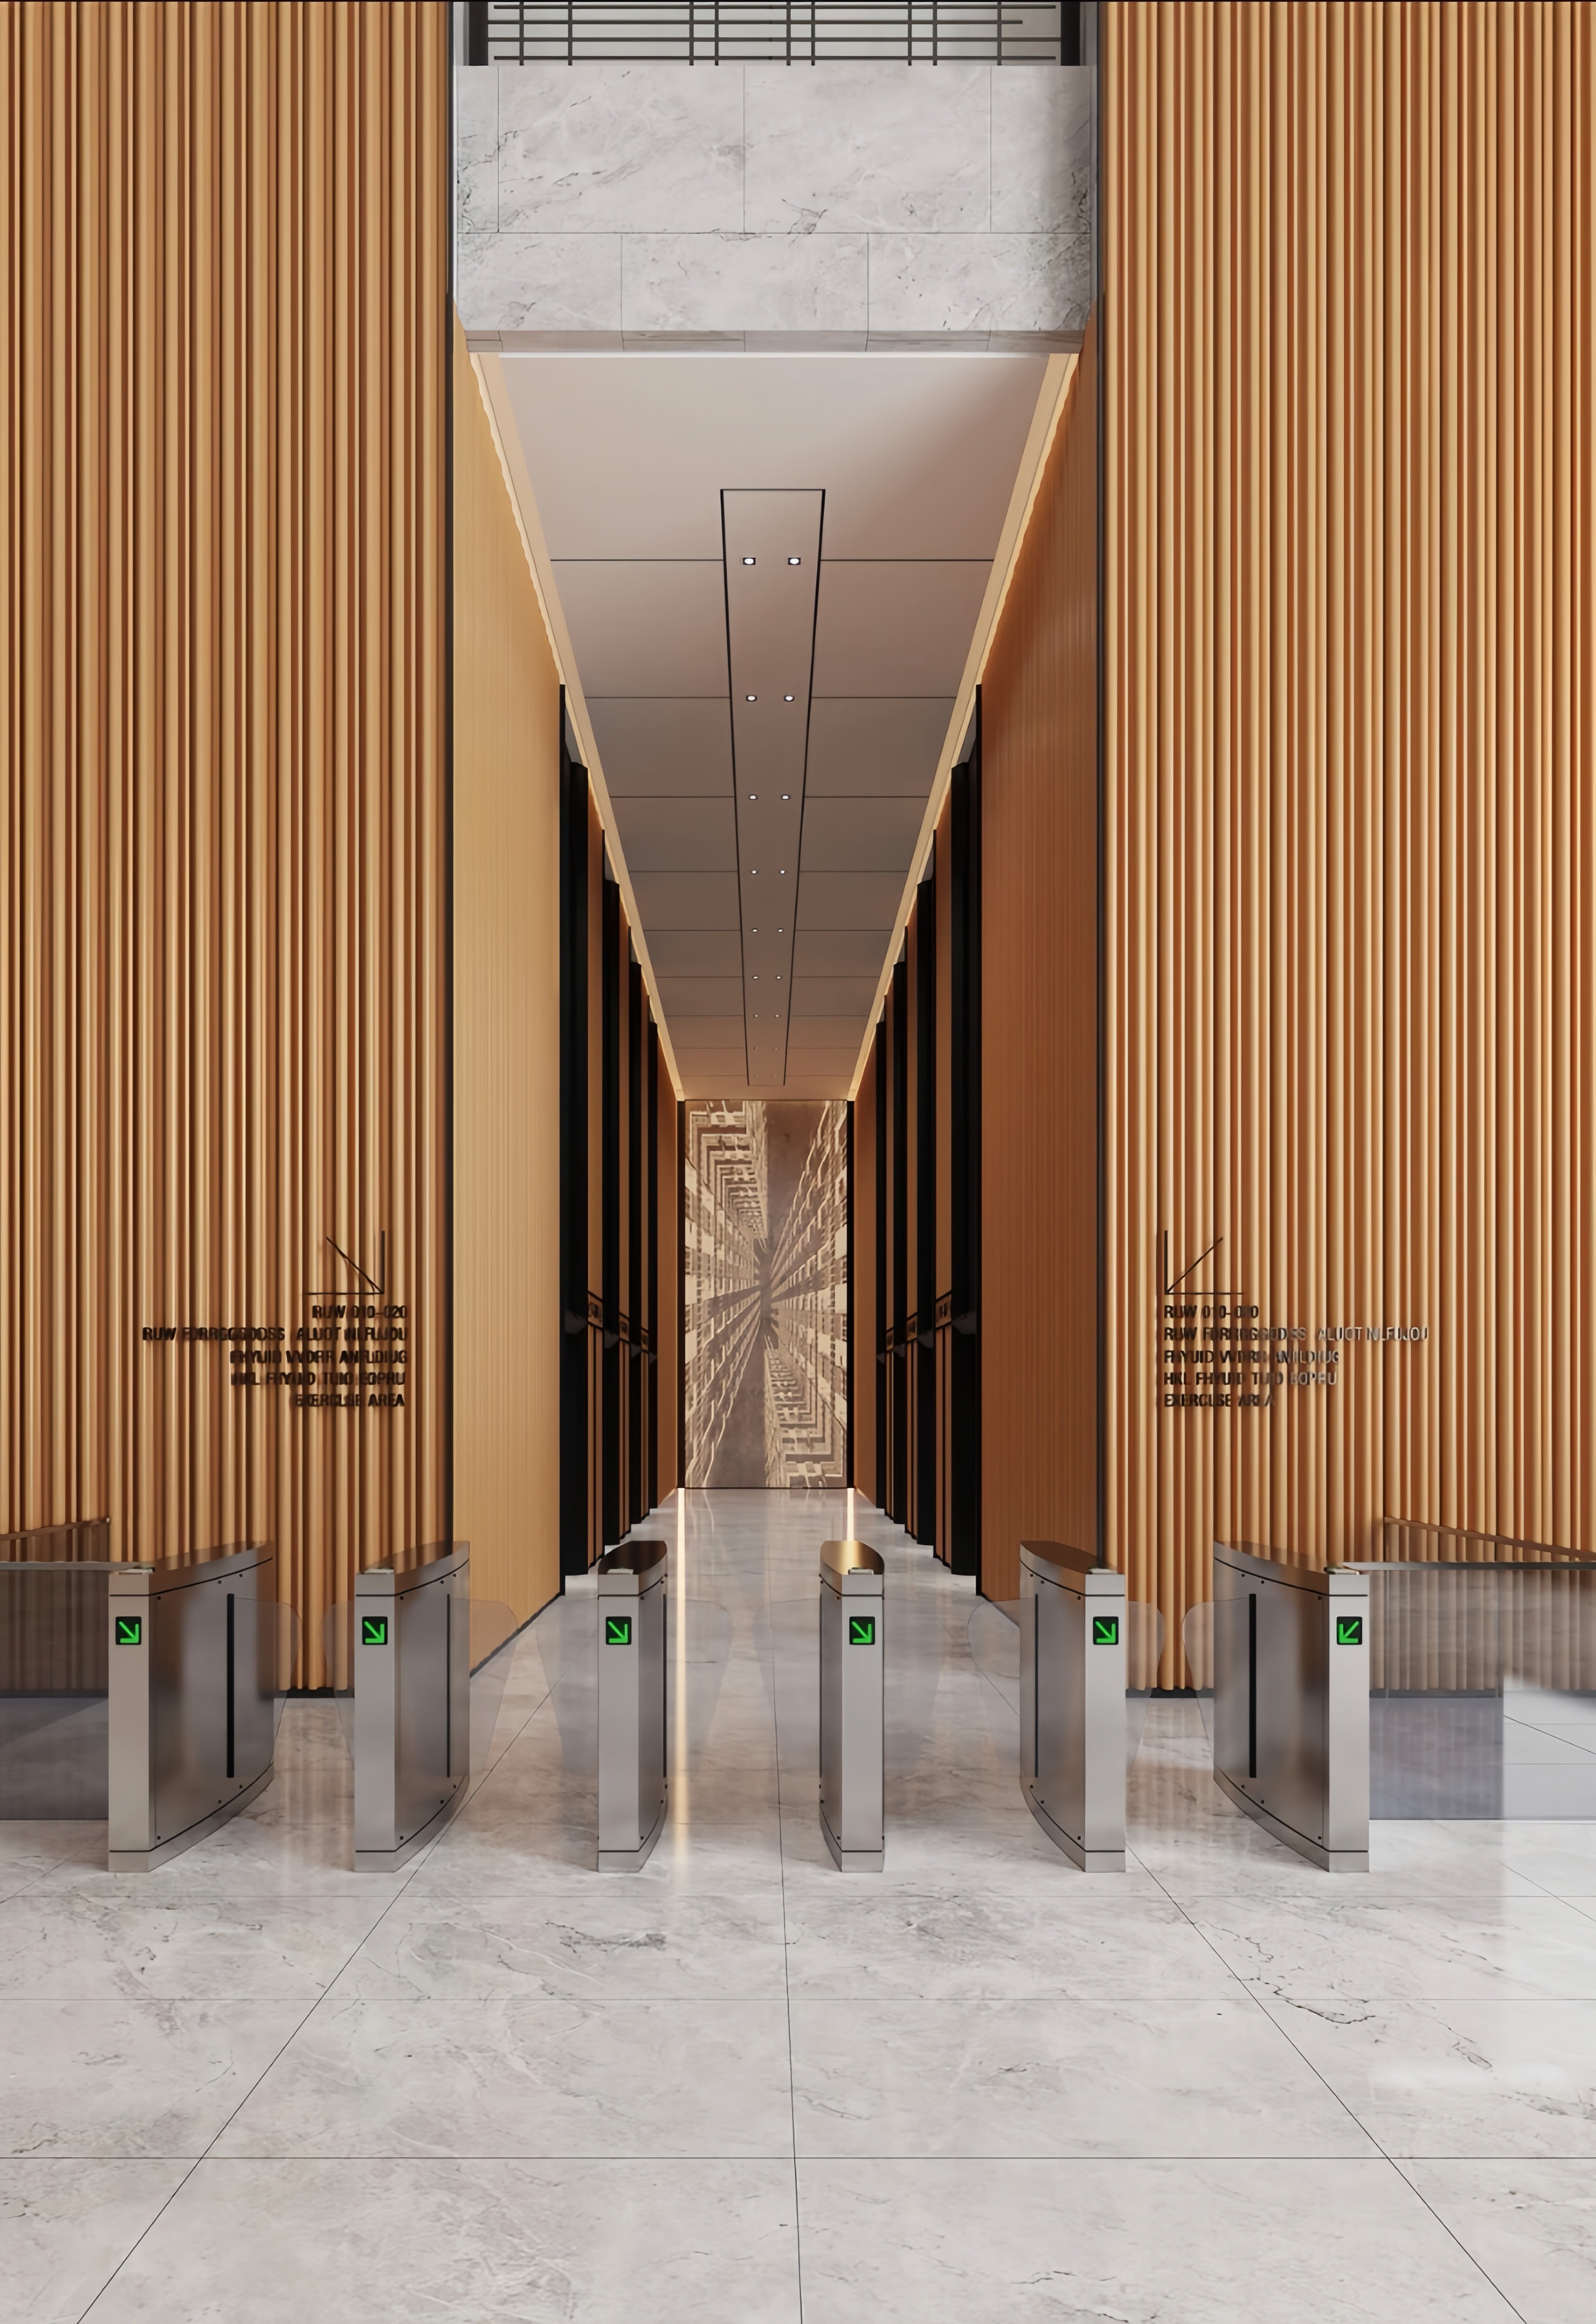
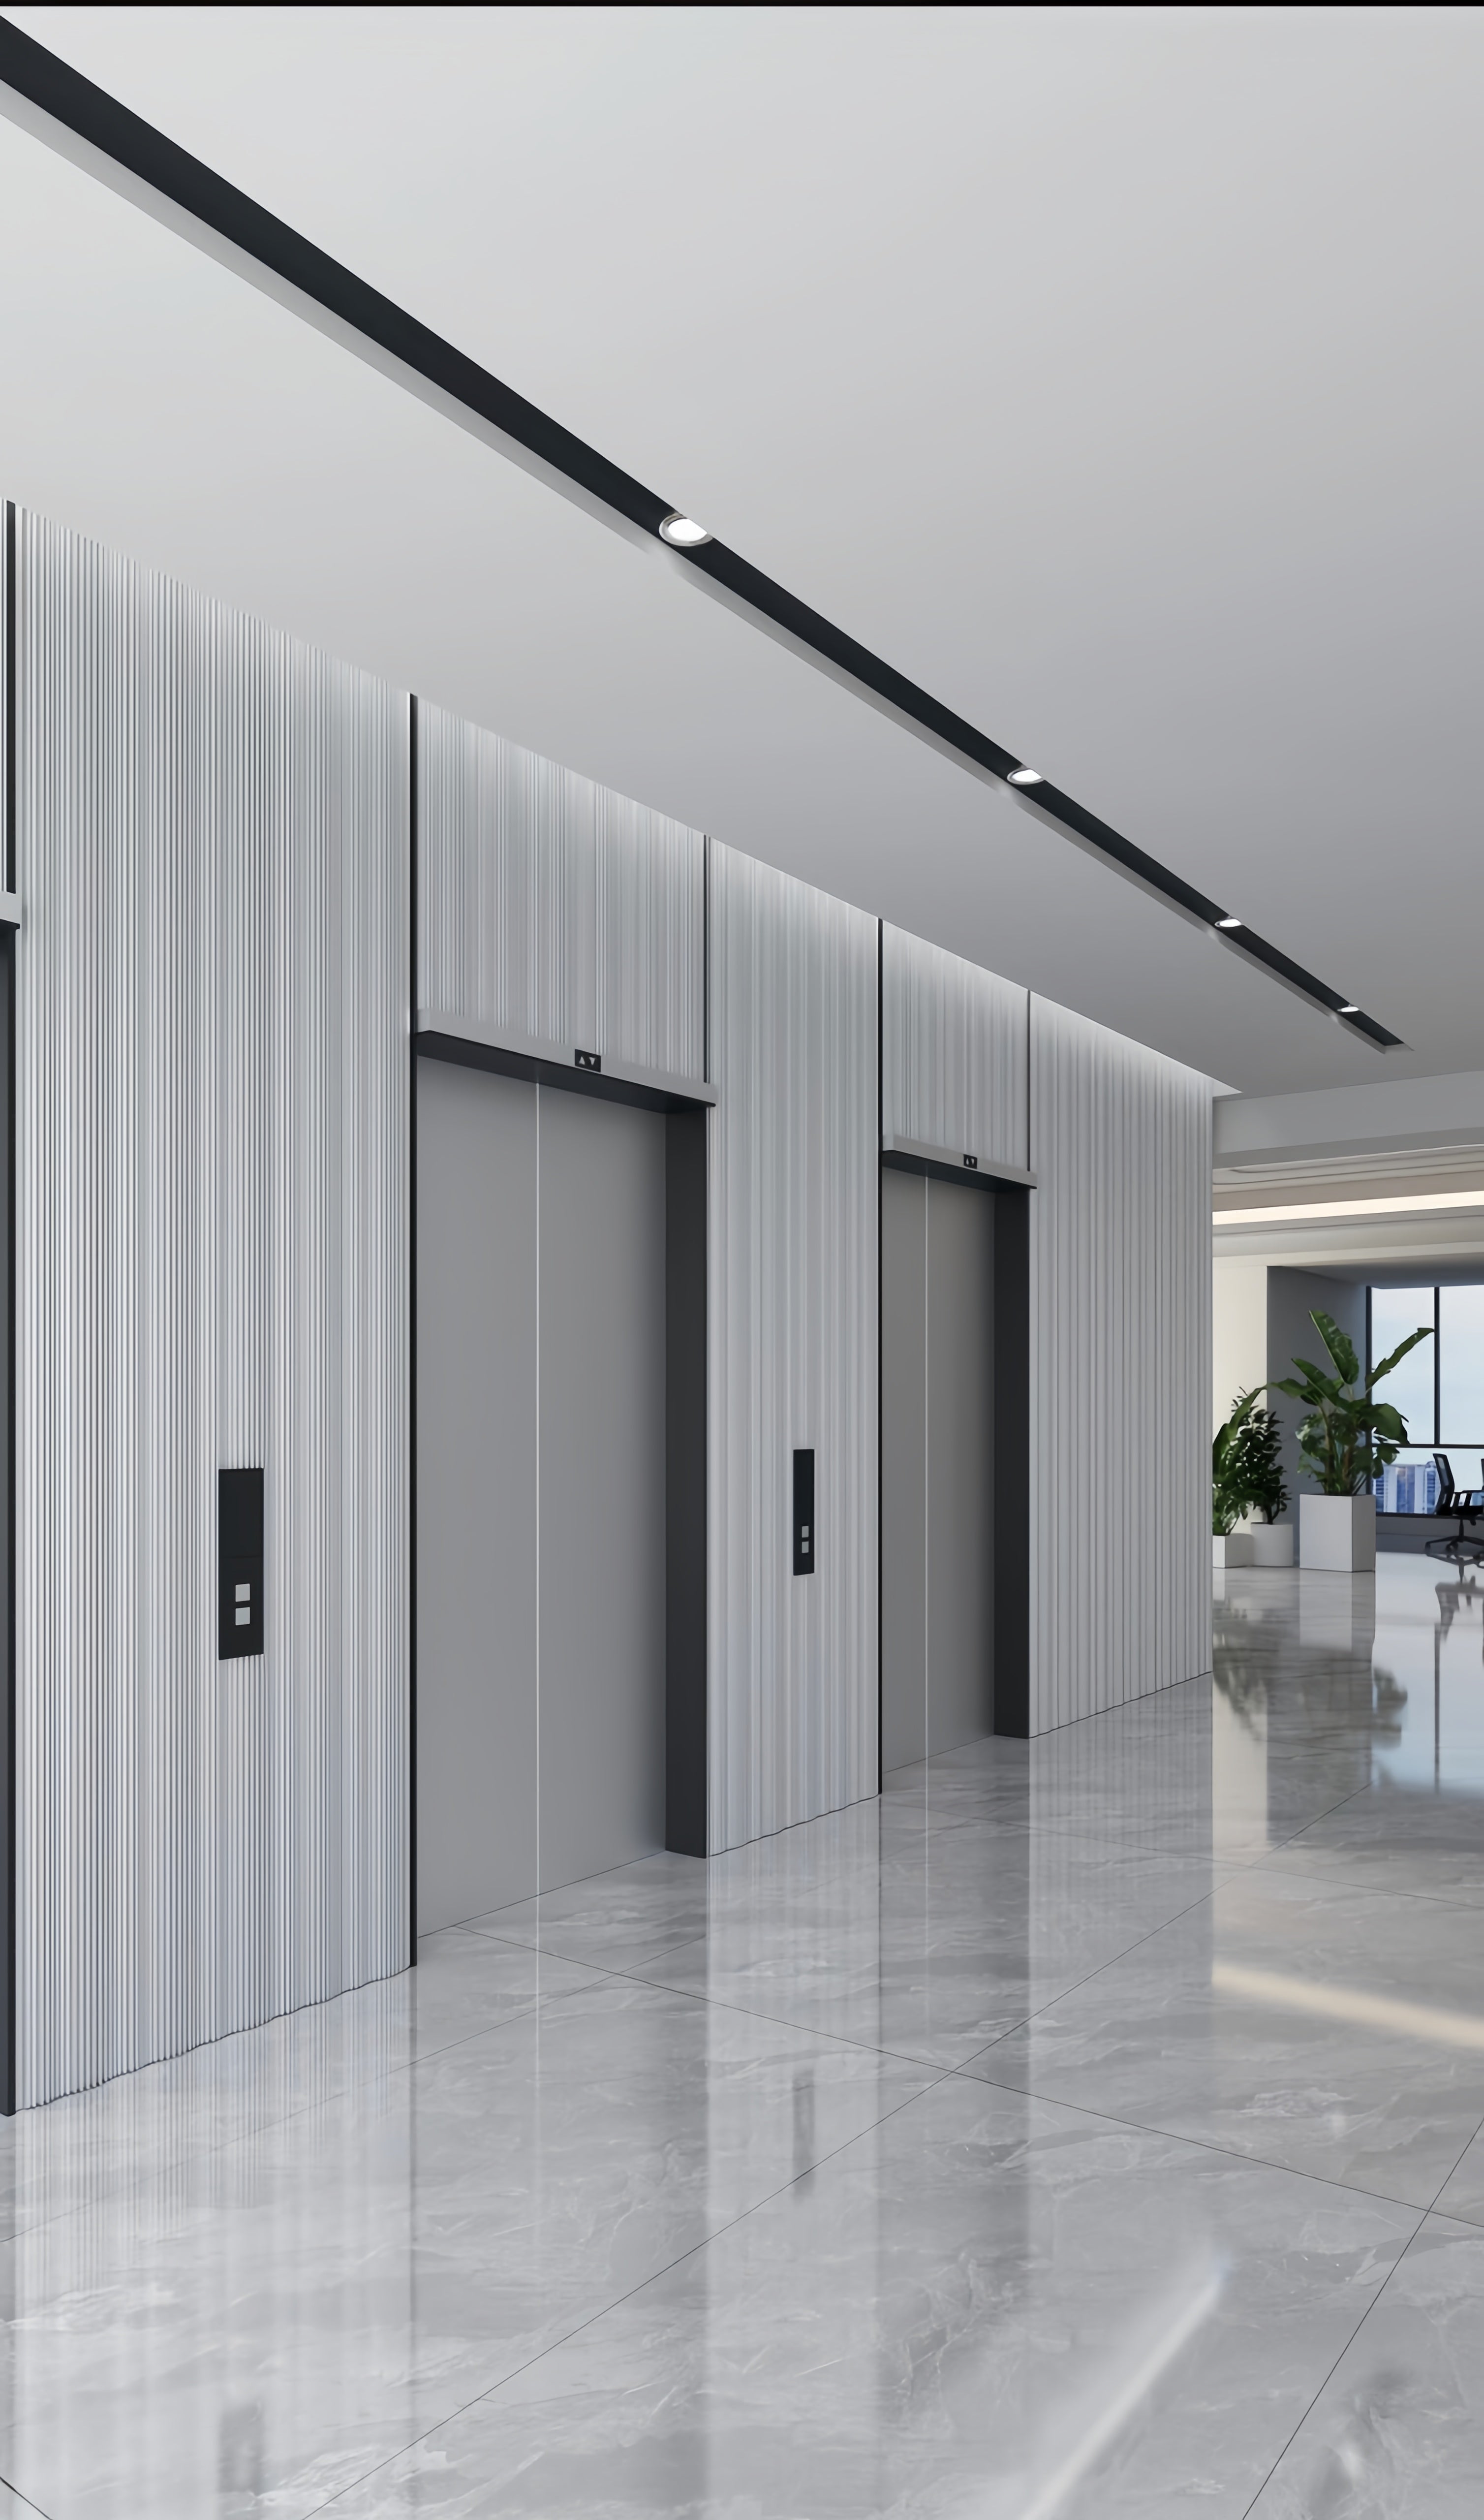
- Modern Office & Corporate Interiors: Add texture and an industrial-chic aesthetic to lobbies, creative workspaces, and corridor walls for a sophisticated, modern edge.
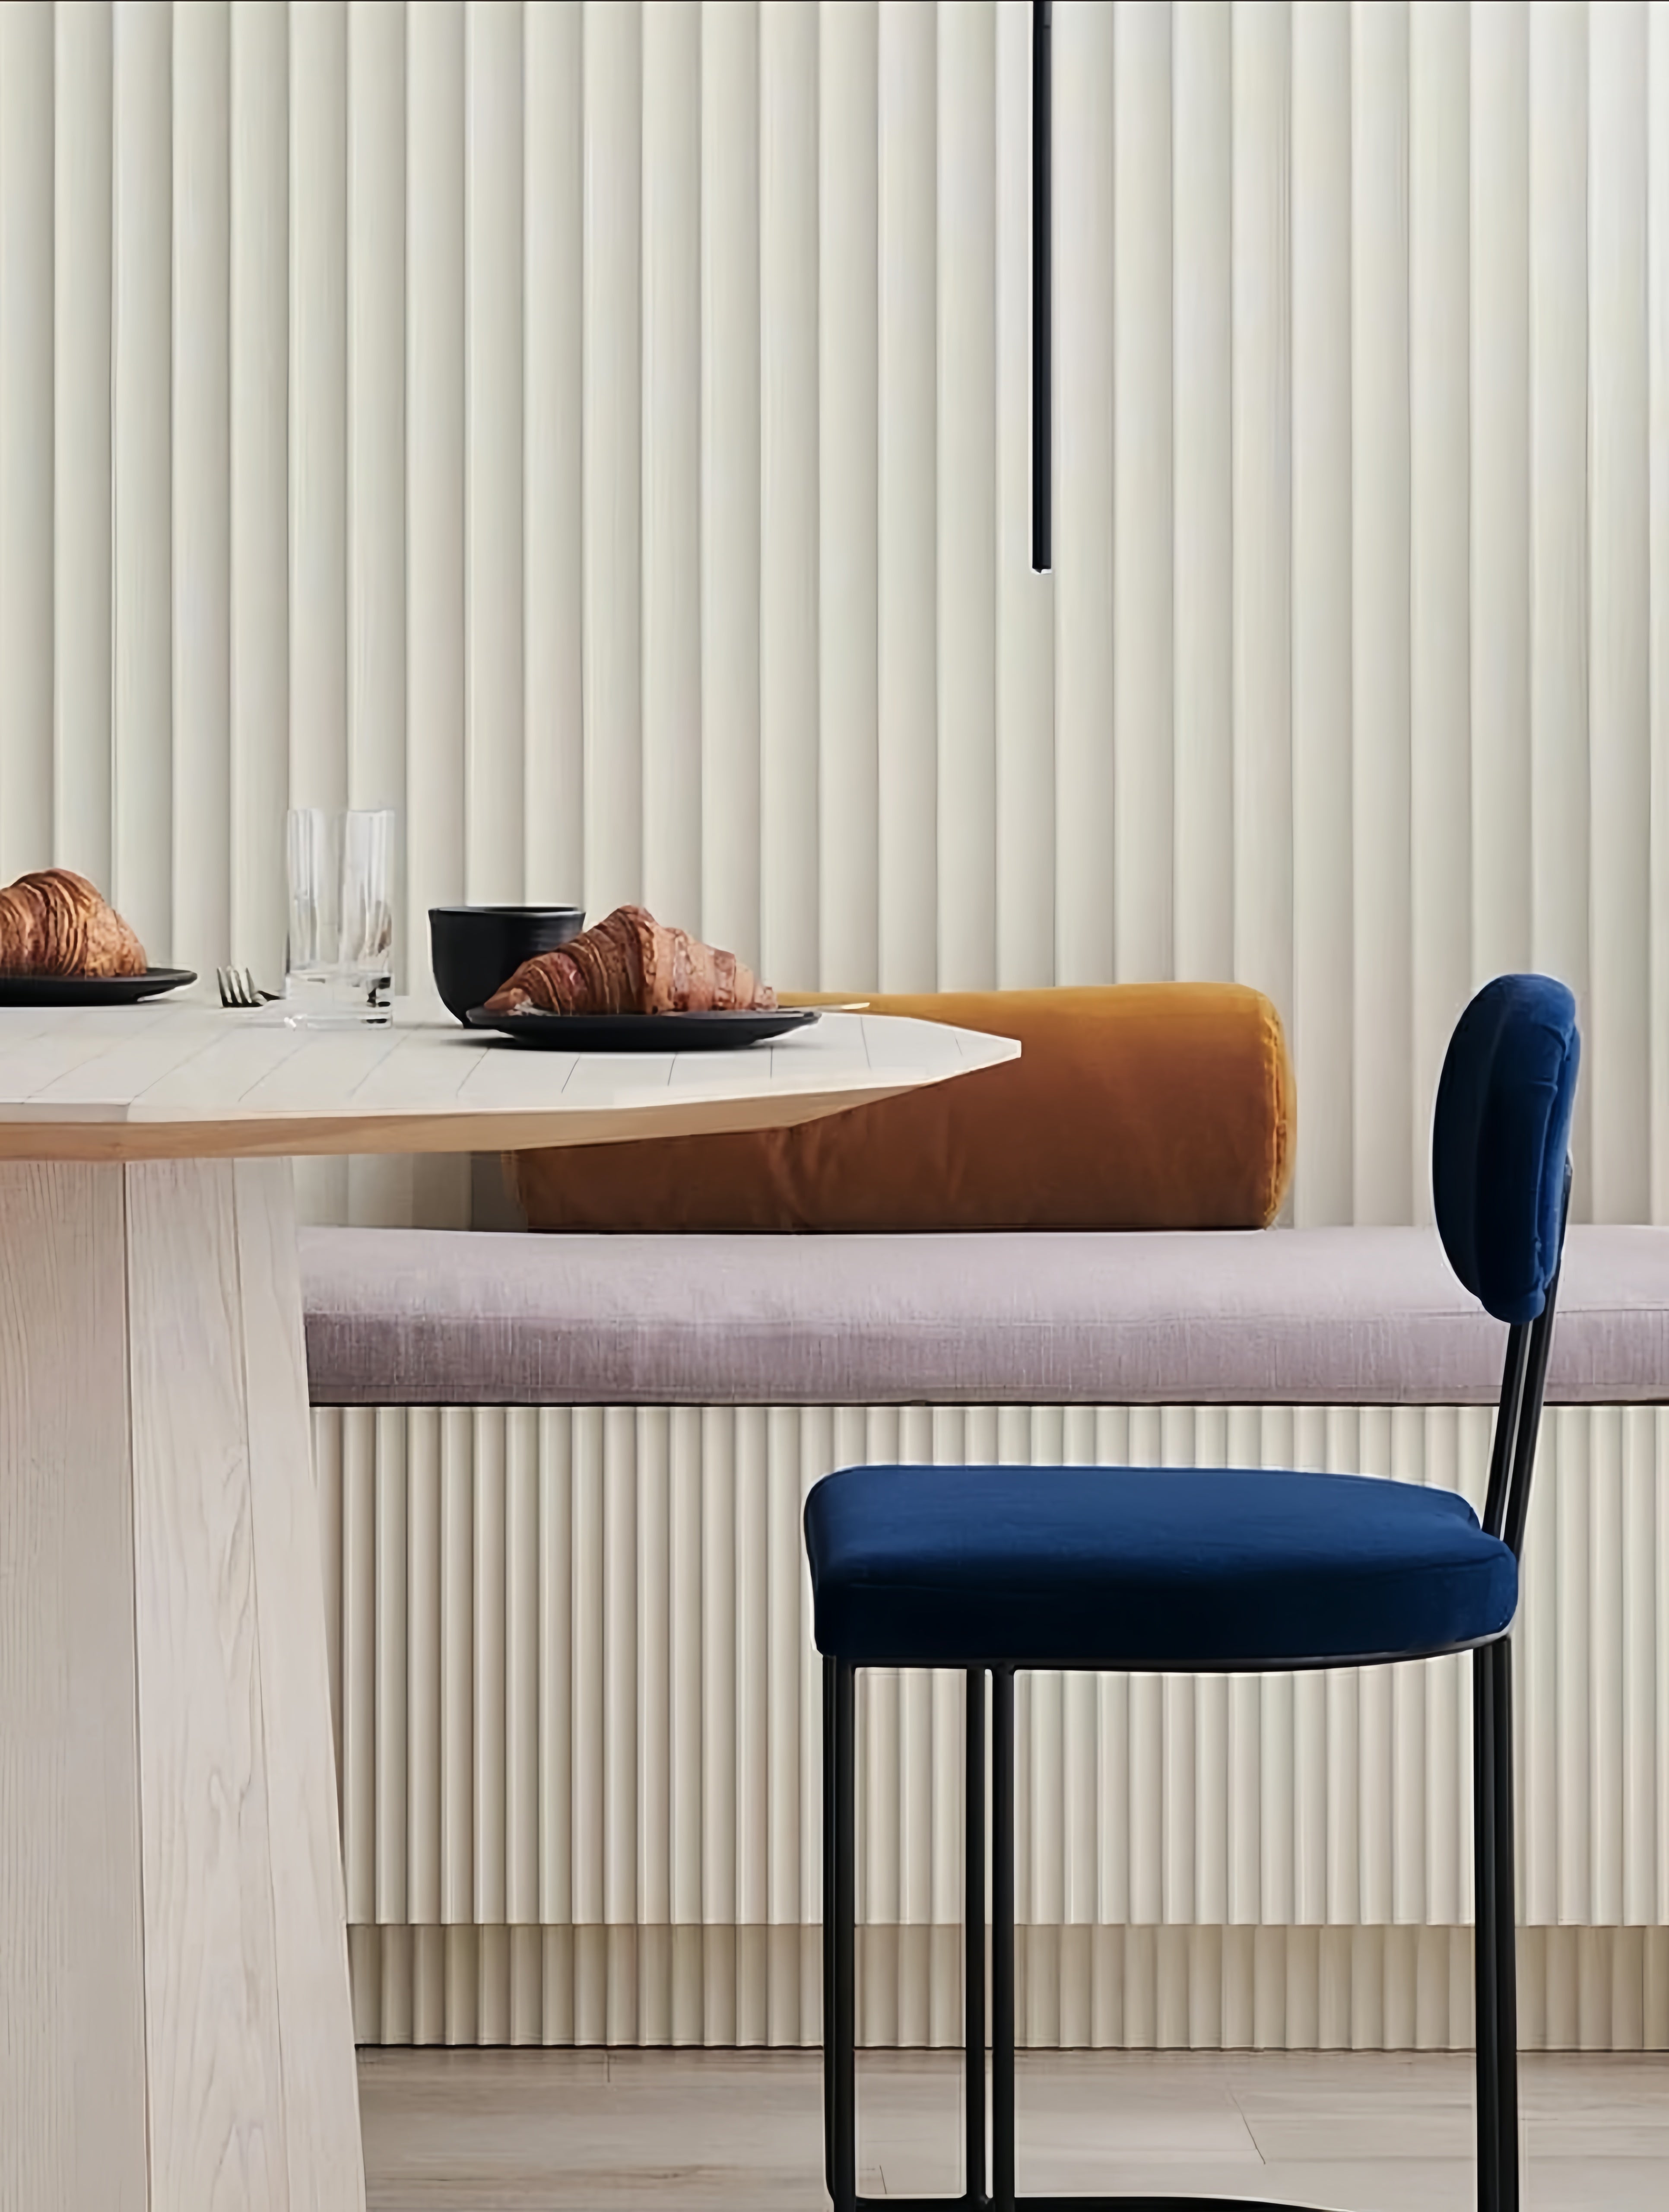
- Residential Accent & Feature Walls: Perfect for creating unique accent walls in living rooms, durable kitchen backsplashes, or transforming basements with a contemporary finish.
- Industrial & High-Traffic Areas: Provides a robust, easy-to-clean, and long-lasting wall solution for corridors, workshops, and high-impact commercial zones.
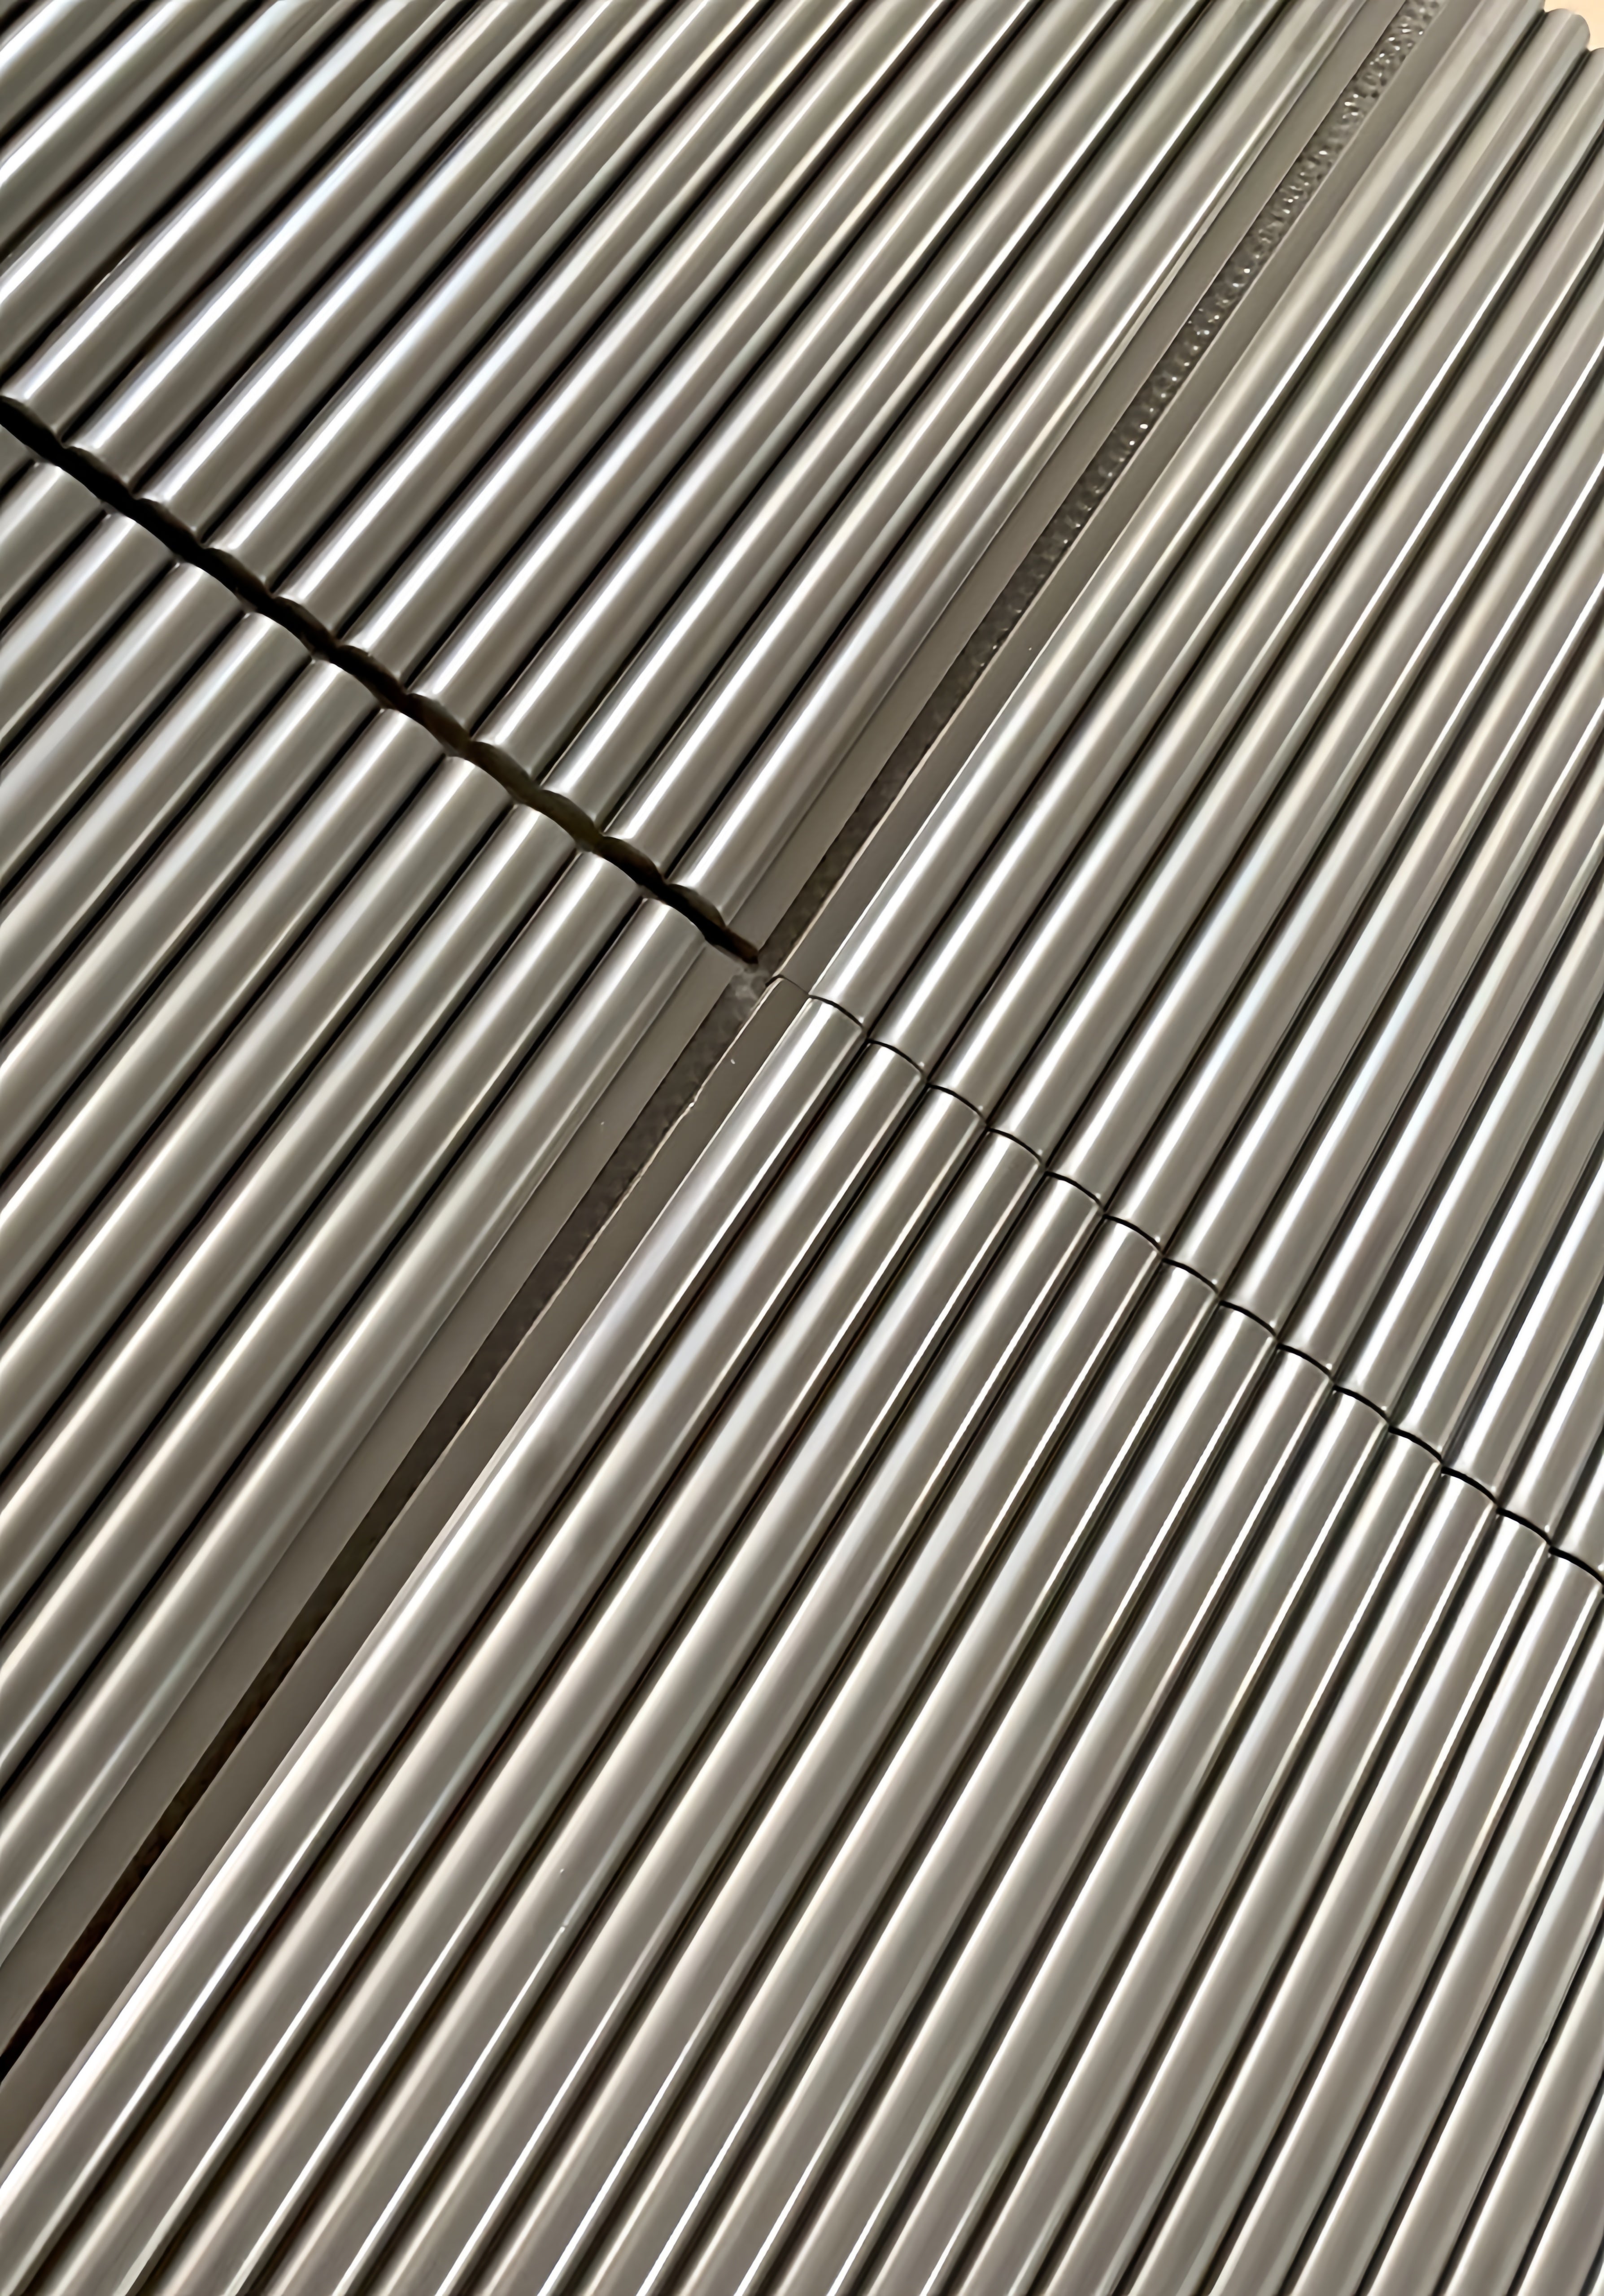
Dynamic Visual Texture
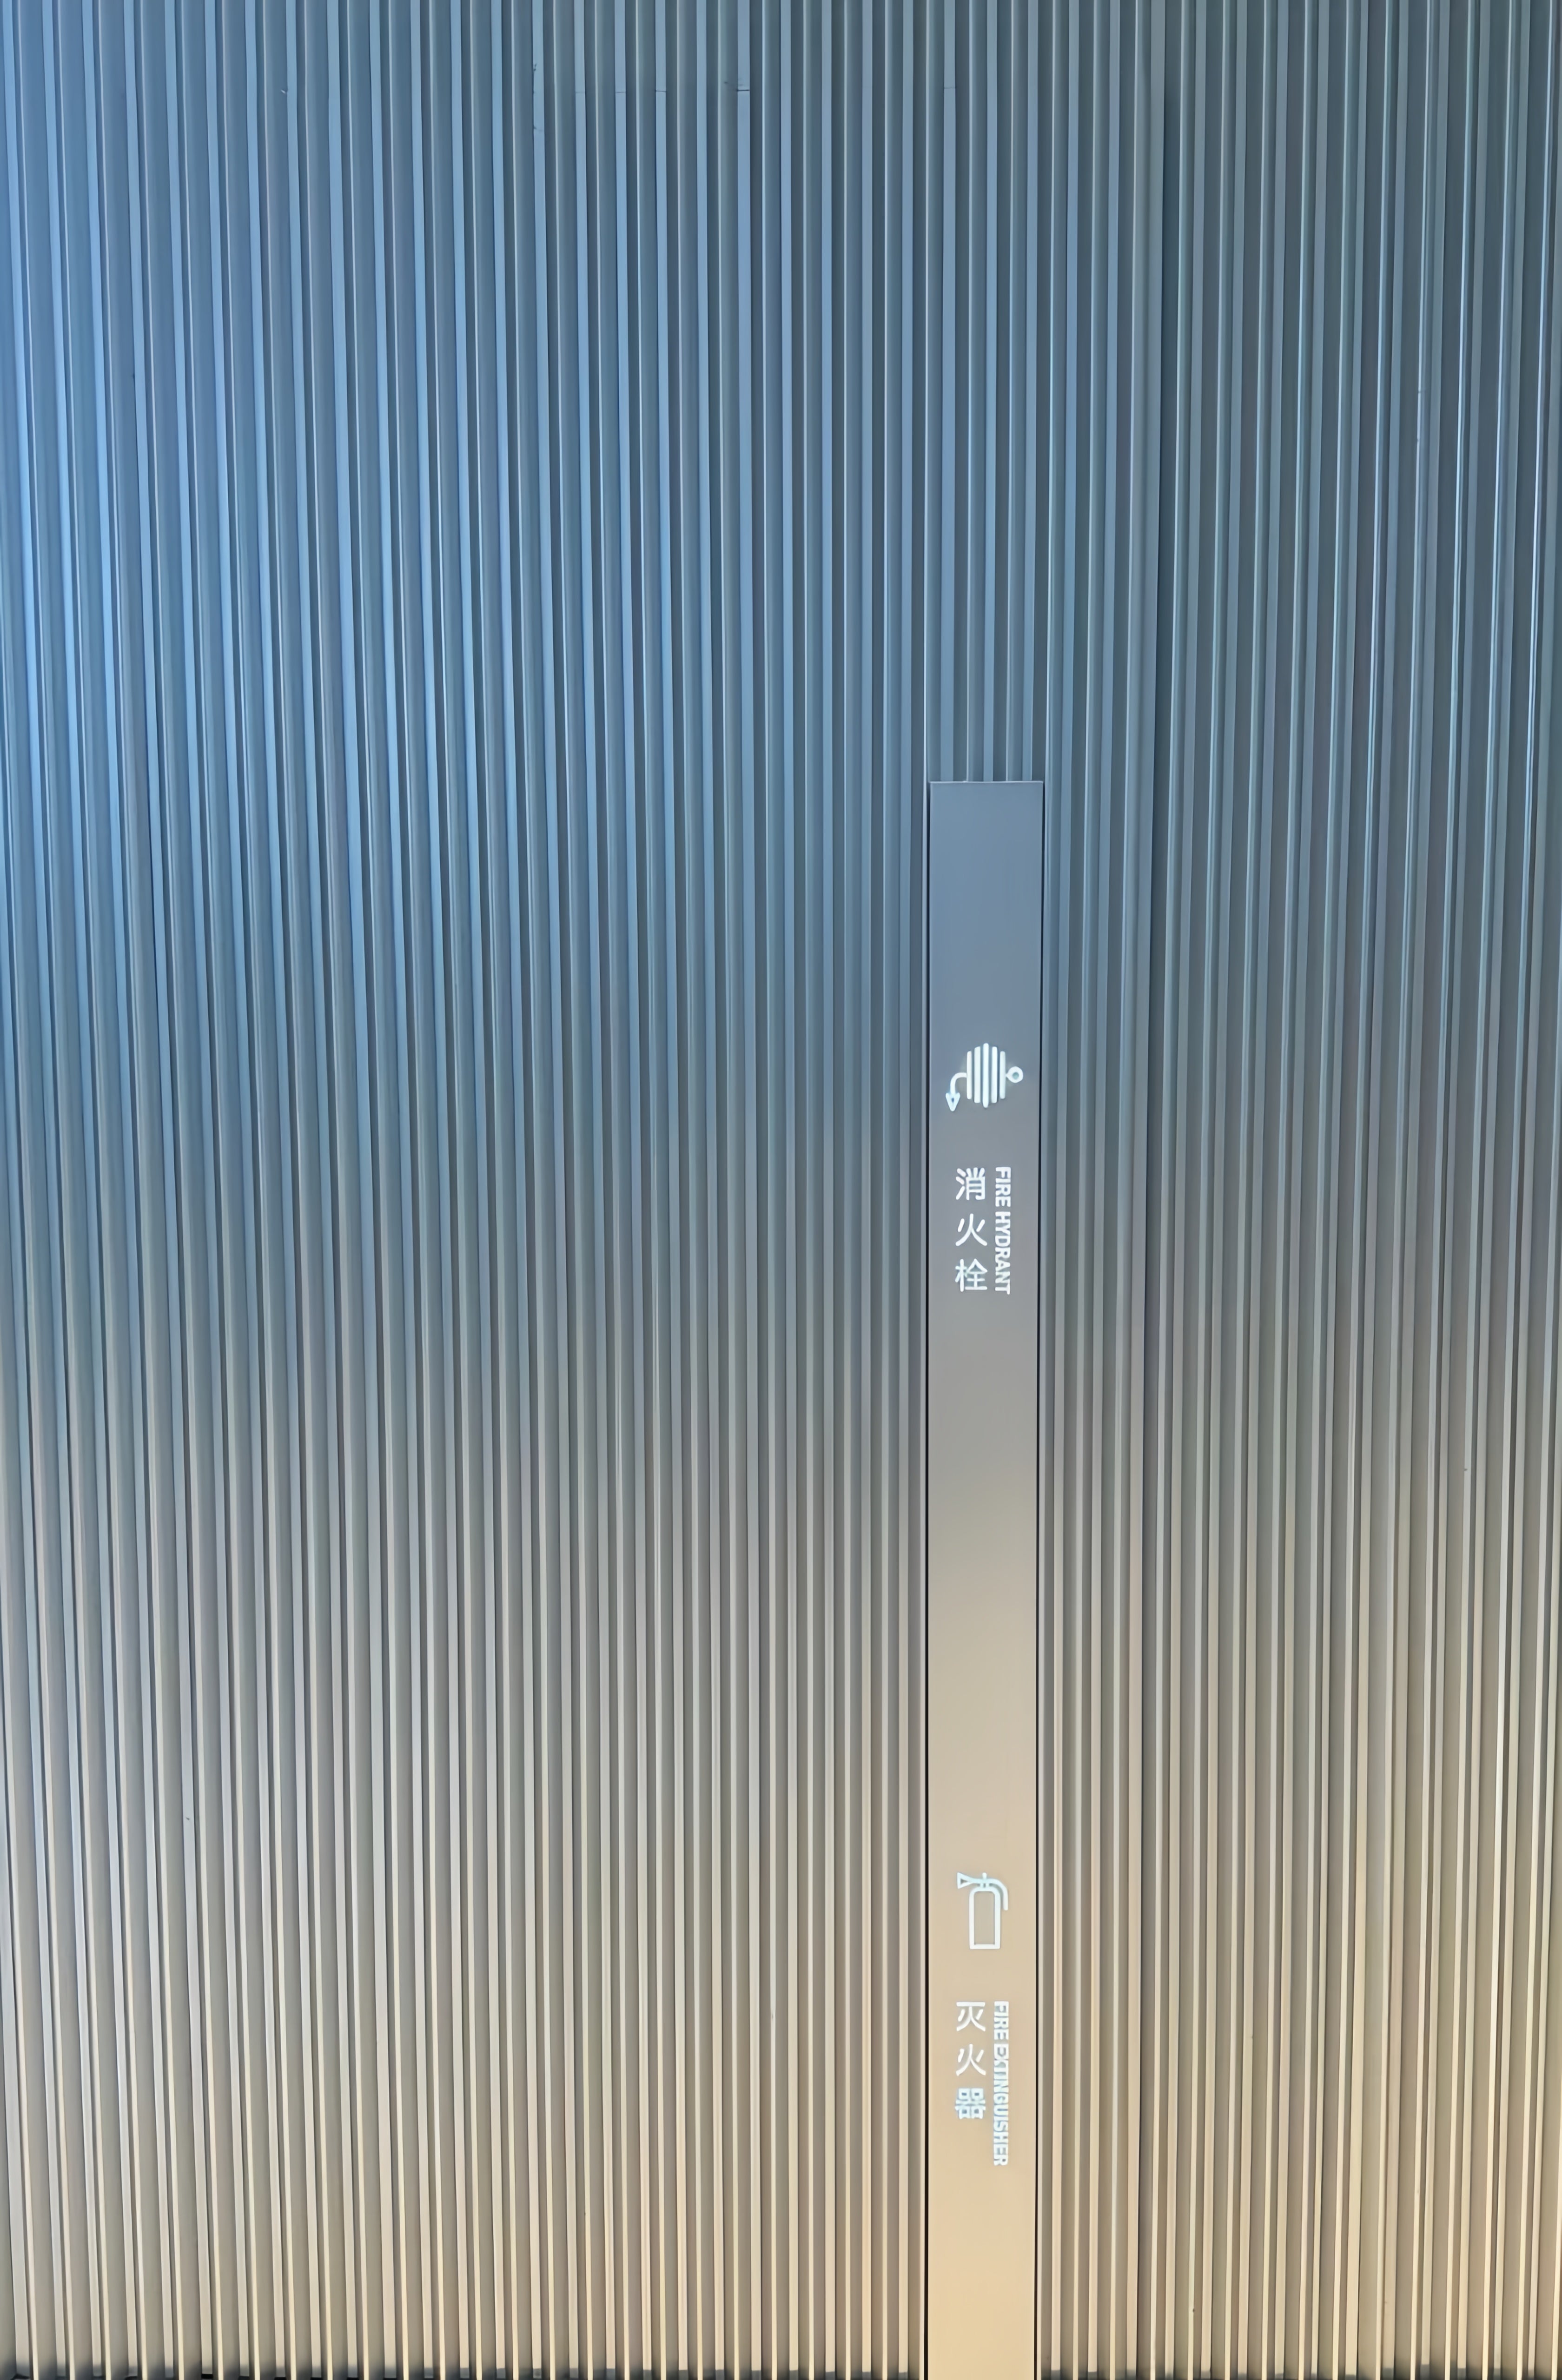
The corrugated profile creates a captivating play of light and shadow, adding depth, rhythm, and a bold industrial character to any interior wall.
Robust & Low Maintenance
Manufactured from durable metal with high-performance coatings, these panels are fire-resistant, scratch-resistant, and easy to clean, ensuring a long-lasting, pristine appearance.
Lightweight & Versatile
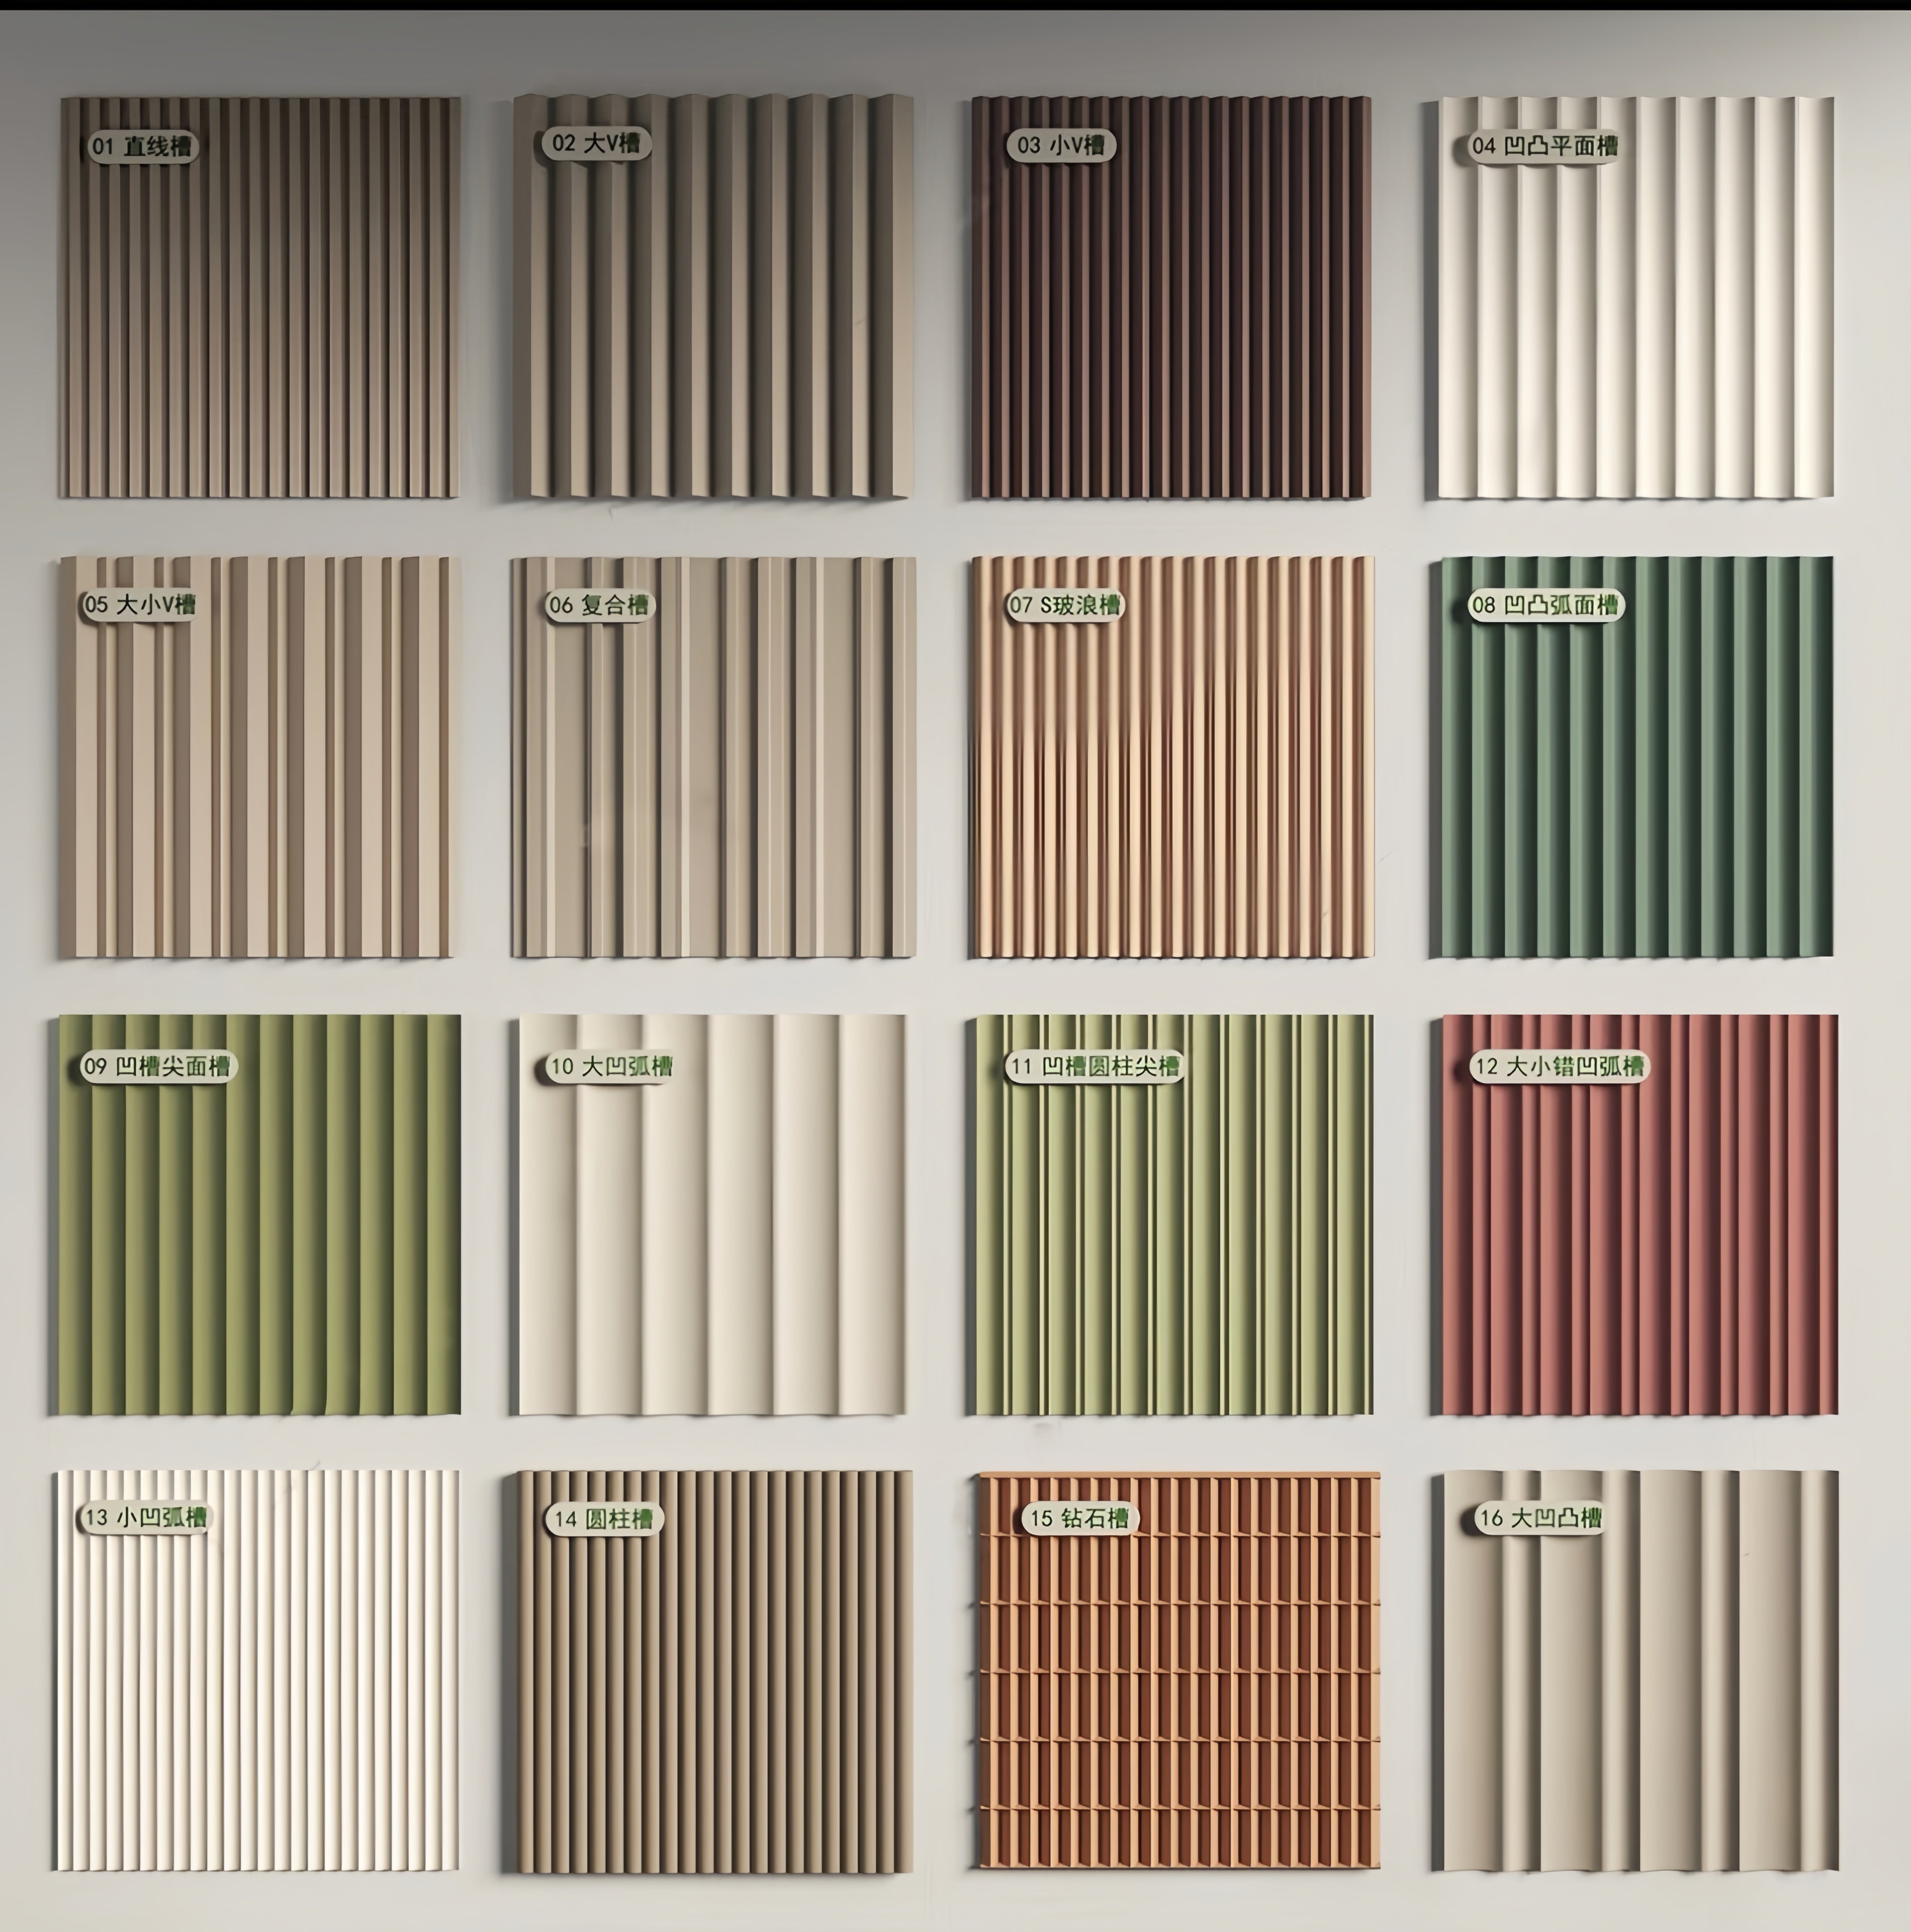
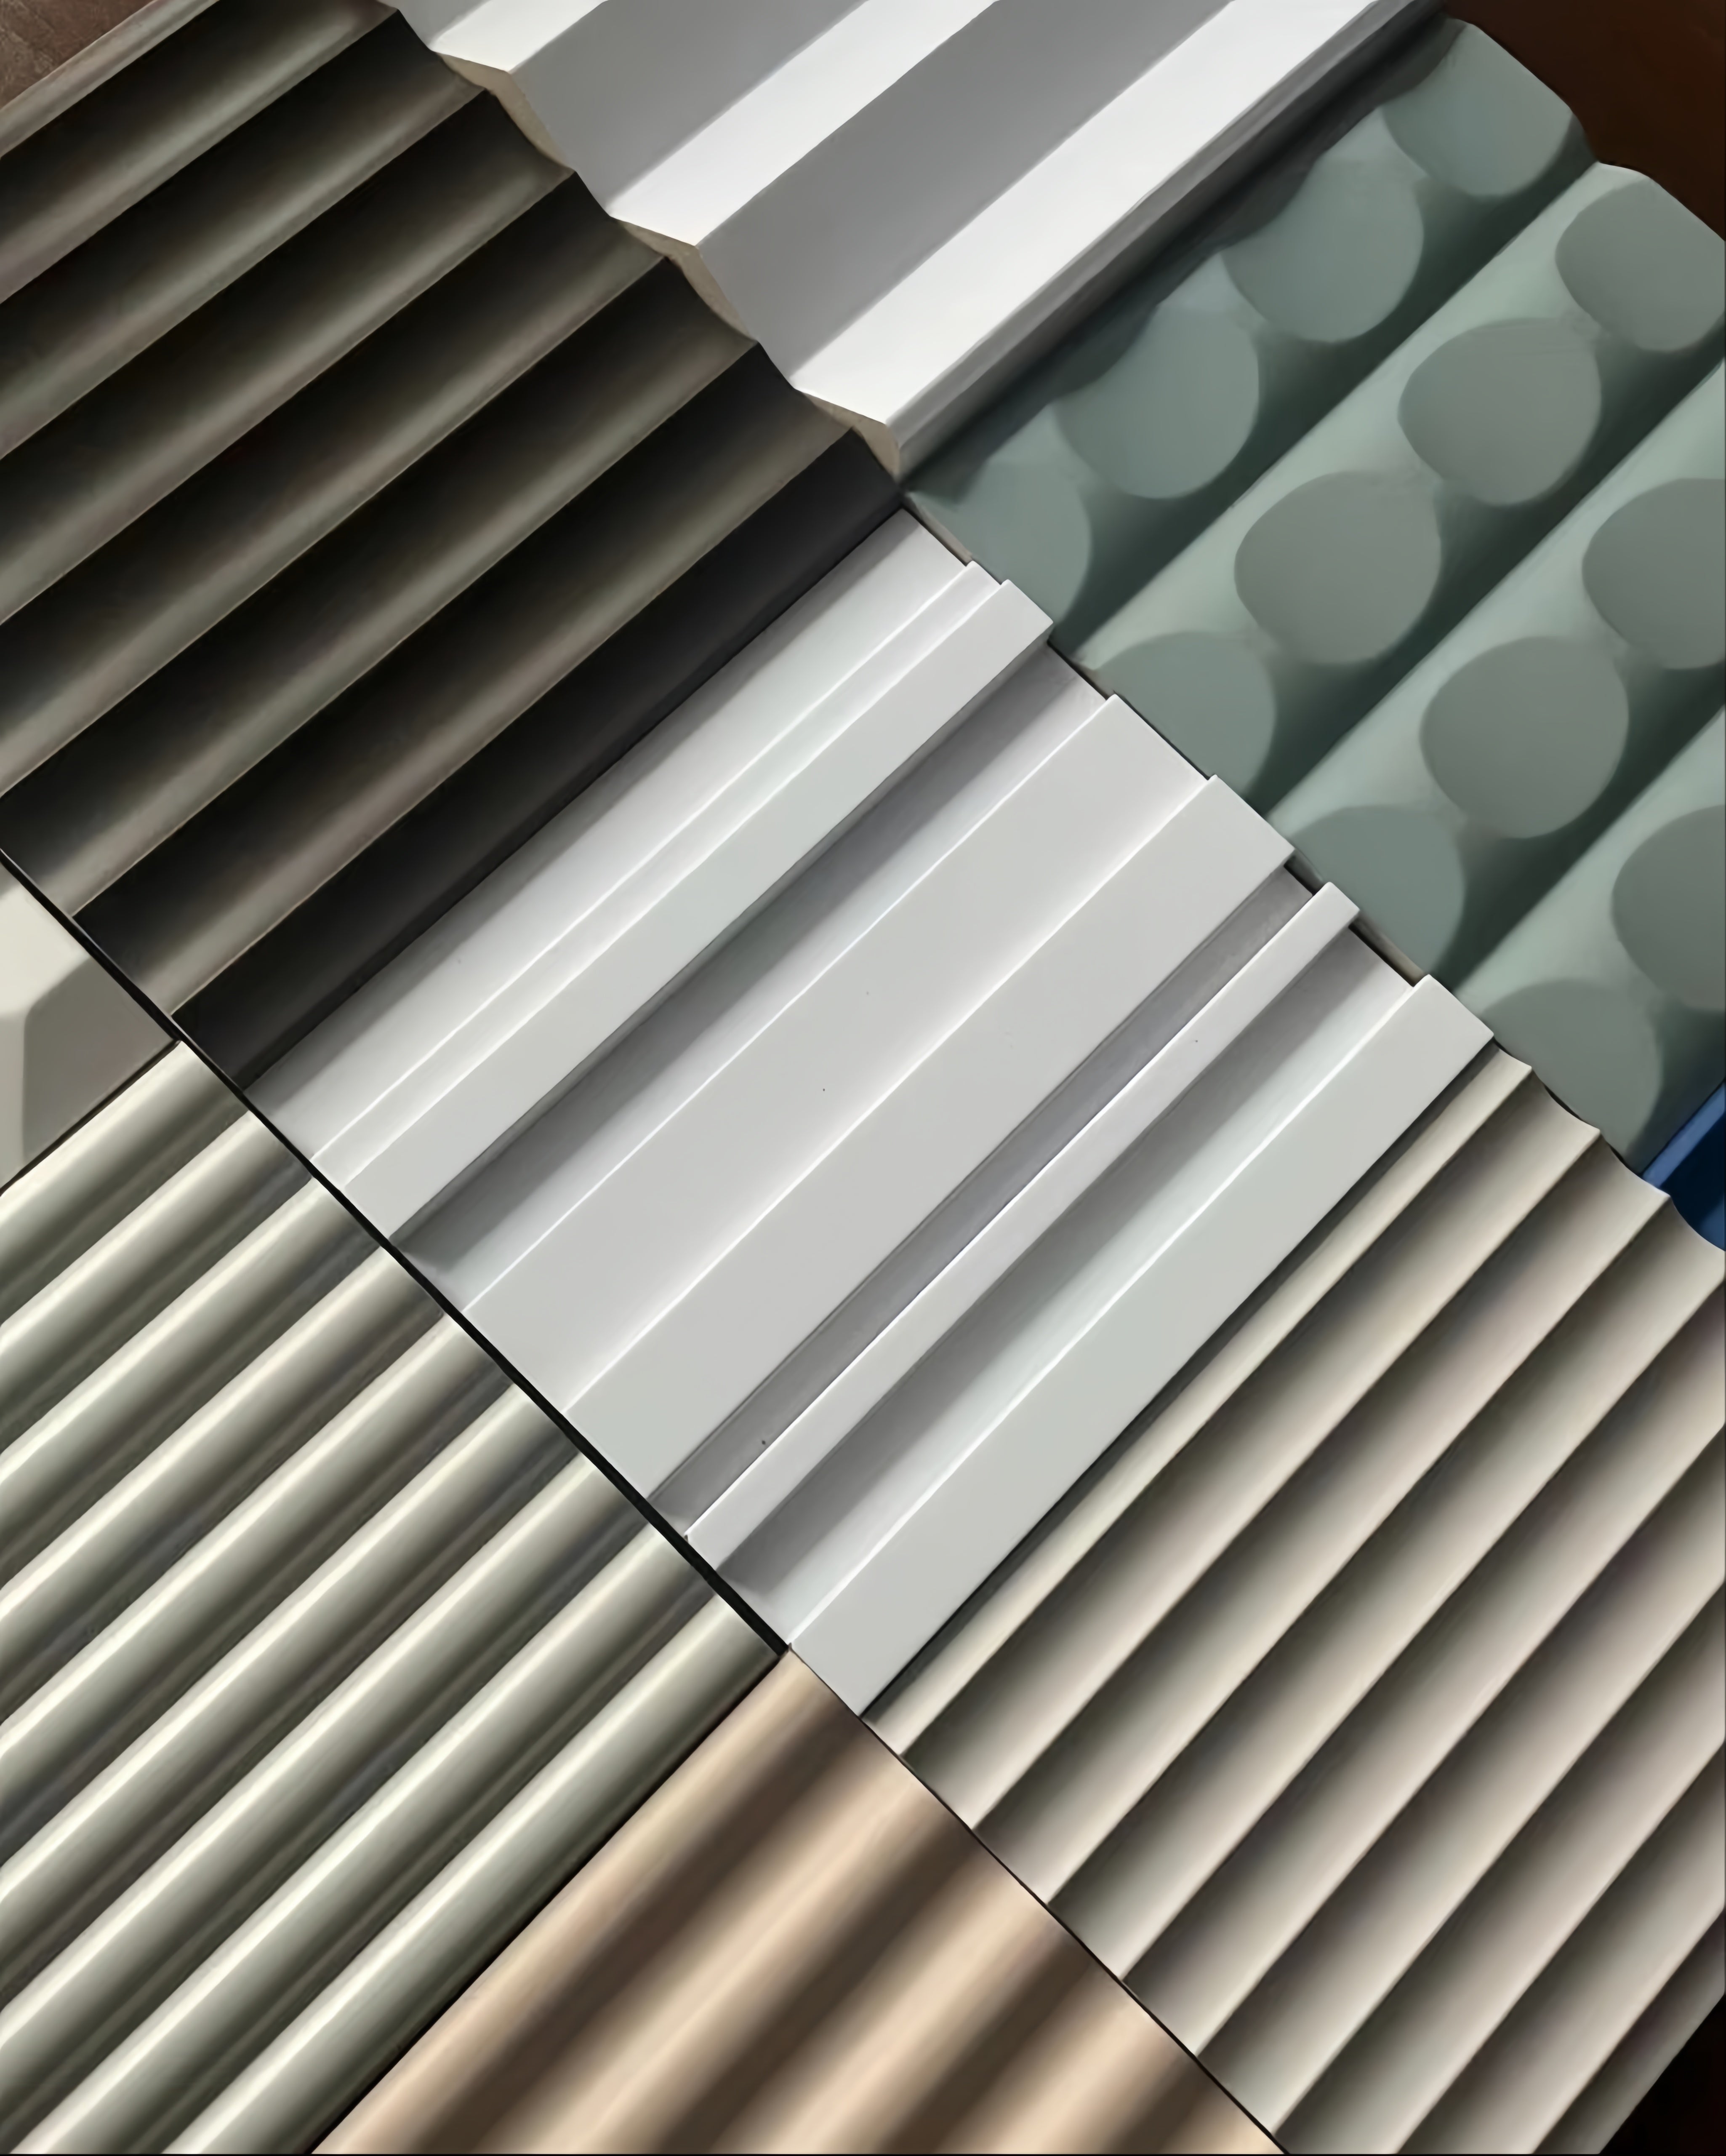
Significantly lighter than traditional materials, our panels are easy to install and can be applied vertically or horizontally in a wide range of profiles and finishes to suit any design vision.
| Profile Type | Pitch (mm) | Depth (mm) | Panel Width (mm) | Coverage Width (mm) | Thickness Range |
|---|---|---|---|---|---|
| Micro Corrugated | 6.4 | 1.6 | 1000 | 980 | 0.4-0.7mm |
| Fine Corrugated | 12.7 | 3.2 | 1000 | 980 | 0.5-0.8mm |
| Standard 7/8" | 19.1 | 4.8 | 1000 | 970 | 0.5-1.0mm |
| Medium 1.5" | 38.1 | 9.5 | 1000 | 950 | 0.6-1.2mm |
| Bold 2.67" | 67.7 | 19.1 | 1000 | 920 | 0.7-1.5mm |
| Linear Ribbed | 25.0 | 12.0 | 1000 | 960 | 0.6-1.0mm |
| Parameter | Standard Range | Custom Options | Tolerance |
|---|---|---|---|
| Panel Length | 1000-6000mm | Up to 12000mm | ±3mm |
| Panel Width | 1000mm standard | 500-1200mm | ±2mm |
| Profile Depth | 1.6-19.1mm | Custom profiles available | ±0.3mm |
| Material Thickness | 0.4-1.5mm | Up to 2.0mm special order | ±0.05mm |
| Edge Finish | Sheared, hemmed, or formed | Custom edge profiles | ±1mm |
| Profile Type | Thickness | Self-Weight | Additional Load | Deflection Limit |
|---|---|---|---|---|
| Micro Corrugated | 0.5mm | 3.9 kg/m² | 0.5 kPa | L/300 |
| Fine Corrugated | 0.6mm | 4.7 kg/m² | 0.8 kPa | L/300 |
| Standard 7/8" | 0.7mm | 5.5 kg/m² | 1.2 kPa | L/250 |
| Medium 1.5" | 0.8mm | 6.3 kg/m² | 1.8 kPa | L/250 |
| Bold 2.67" | 1.0mm | 7.8 kg/m² | 2.5 kPa | L/200 |
| Mounting Type | Load Capacity | Spacing | Substrate | Installation |
|---|---|---|---|---|
| Direct Screw | 0.8 kN/m² | 300-400mm | Wood, steel, concrete | Simple, economical |
| Clip System | 1.2 kN/m² | 400-600mm | Metal framing | Concealed fastening |
| Rail System | 1.5 kN/m² | 600-800mm | Any substrate | Maximum flexibility |
| Adhesive Mount | 0.5 kN/m² | Full contact | Smooth surfaces | Clean appearance |
| Configuration | Thermal Conductivity | R-Value | Thermal Mass | Condensation Risk |
|---|---|---|---|---|
| Single Layer | High (metal) | Minimal | Low | Moderate |
| With Air Gap | Reduced | 0.15-0.25 m²K/W | Low | Reduced |
| Insulated Backing | Low | 0.5-2.0 m²K/W | Medium | Minimal |
| Double Wall | Very Low | 1.0-3.0 m²K/W | Medium | Very Low |
| System Configuration | NRC | STC Rating | Sound Absorption | Applications |
|---|---|---|---|---|
| Solid Backing | 0.05-0.10 | 25-30 dB | Minimal | Visual applications |
| Air Gap (25mm) | 0.15-0.25 | 30-35 dB | Low | General commercial |
| Insulated Cavity | 0.25-0.45 | 35-45 dB | Moderate | Office environments |
| Perforated + Insulation | 0.60-0.85 | 40-50 dB | High | Acoustic applications |
| Material Type | Flame Spread | Smoke Development | Fire Rating | Compliance |
|---|---|---|---|---|
| Steel (All Types) | 0-25 (Class A) | 0-50 (Class A) | Non-combustible | IBC, NFPA |
| Aluminum | 0-25 (Class A) | 0-50 (Class A) | Non-combustible | IBC, NFPA |
| Stainless Steel | 0-25 (Class A) | 0-50 (Class A) | Non-combustible | IBC, NFPA |
| Coated Systems | Varies by coating | Varies by coating | Non-combustible base | Test required |
| Grade | Composition | Properties | Finish Options | Applications |
|---|---|---|---|---|
| 304 | 18Cr-8Ni | General purpose, good corrosion resistance | 2B, #4, BA | Food service, healthcare |
| 316 | 18Cr-10Ni-2Mo | Marine grade, superior corrosion resistance | 2B, #4, BA | Severe environments |
| 321 | 18Cr-9Ni-Ti | High temperature stability | 2B, #4 | High-heat applications |
| 430 | 17Cr (Ferritic) | Magnetic, economical | 2B, #4 | Decorative applications |
| Alloy | Temper | Strength | Formability | Applications |
|---|---|---|---|---|
| 1100 | H14 | Low | Excellent | Simple profiles, economy |
| 3003 | H14 | Medium | Very Good | General purpose, residential |
| 3004 | H32 | Medium-High | Good | Commercial, architectural |
| 5052 | H32 | High | Good | High-performance applications |
| 6061 | T6 | Very High | Fair | Structural applications |
| Coating Type | Thickness | Durability | Color Options | Applications |
|---|---|---|---|---|
| Polyester | 25-35μm | Good | Standard palette | General commercial |
| Epoxy | 30-50μm | Excellent | Limited colors | Industrial, chemical resistance |
| Polyurethane | 25-40μm | Excellent | Full spectrum | High-traffic areas |
| Acrylic | 20-30μm | Good | Unlimited | Residential, light commercial |
| Powder Coat | 60-100μm | Excellent | Unlimited | Premium applications |
FAQs
How should exposed edges be finished to ensure safety in high-traffic interior zones?
Unlike exterior siding, interior metal walls require meticulous edge detailing to prevent injury from sharp factory-cut edges, especially in residential or commercial spaces with foot traffic. We recommend a three-part trim system:
J-Tracks (J-Trim): These U-shaped channels are essential for capping the top, bottom, and sides of the panels. They completely encase the sharp raw edge, providing a clean, finished look while eliminating safety hazards.
Corner Guards: For outside corners (where two walls meet), use L-shaped angle trims or rounded corner guards. These protect pedestrians from sharp points and prevent the panel edges from snagging on clothing or being damaged by cleaning equipment.
Base Molding: In commercial corridors, installing a robust baseboard (metal, rubber, or wood) at the floor level protects the bottom edge of the corrugated panel from impact damage caused by mops, vacuum cleaners, and carts.
Can I install corrugated metal panels directly over existing drywall or damaged walls?
Yes, installing corrugated panels directly over existing surfaces (known as "over-cladding") is a popular and cost-effective renovation strategy. This method eliminates the need for messy demolition and drywall removal.
Hiding Imperfections: The textured profile of the metal effectively conceals cracks, stains, or uneven finishes on the original wall, providing an instant facelift for aging interiors.
Anchoring Requirements: While the panels are lightweight, you cannot rely solely on the drywall to hold them. Fasteners must penetrate through the drywall and anchor securely into the structural studs (wood or steel) or solid blocking behind it to ensure stability.
Moisture Barrier: For applications in basements or kitchens, installing over existing walls provides an excellent opportunity to add a vapor barrier or thin insulation layer between the old wall and the new metal skin to improve thermal performance.
Are perforated panels suitable for large buildings?
Perforated panels are suitable for large buildings because they provide good ventilation and lighting effects, while also being decorative and practical. They are applicable for decorative and functional needs such as facades and ceilings of large buildings.
What material of perforated panel is better for a project?
Choosing alloy perforated panels is a good option as they are lightweight and possess good strength characteristics. Additionally, stainless steel perforated panels are also a common choice due to their high corrosion resistance and structural strength. The final selection should also consider factors like project budget, design requirements, and environmental conditions.
What Are the Key Design Considerations for Interior Corrugated Metal Walls?
Interior corrugated metal wall design requires careful consideration of aesthetic goals, functional requirements, building codes, and integration with other building systems:
Aesthetic Design Principles:
Scale and Proportion:
- Profile selection: Match corrugation depth to room scale and ceiling height
- Visual weight: Deeper profiles create stronger visual impact
- Rhythm and pattern: Consistent corrugation creates visual rhythm
- Contrast opportunities: Mix with smooth materials for visual interest
- Lighting interaction: Profile depth affects shadow patterns and lighting design
Profile Depth Guidelines:
Room Height Recommendations:
- 2.4-3.0m ceilings: Micro to Fine corrugated (1.6-3.2mm depth)
- 3.0-4.0m ceilings: Fine to Standard corrugated (3.2-4.8mm depth)
- 4.0-6.0m ceilings: Standard to Medium corrugated (4.8-9.5mm depth)
- 6.0m+ ceilings: Medium to Bold corrugated (9.5-19.1mm depth)
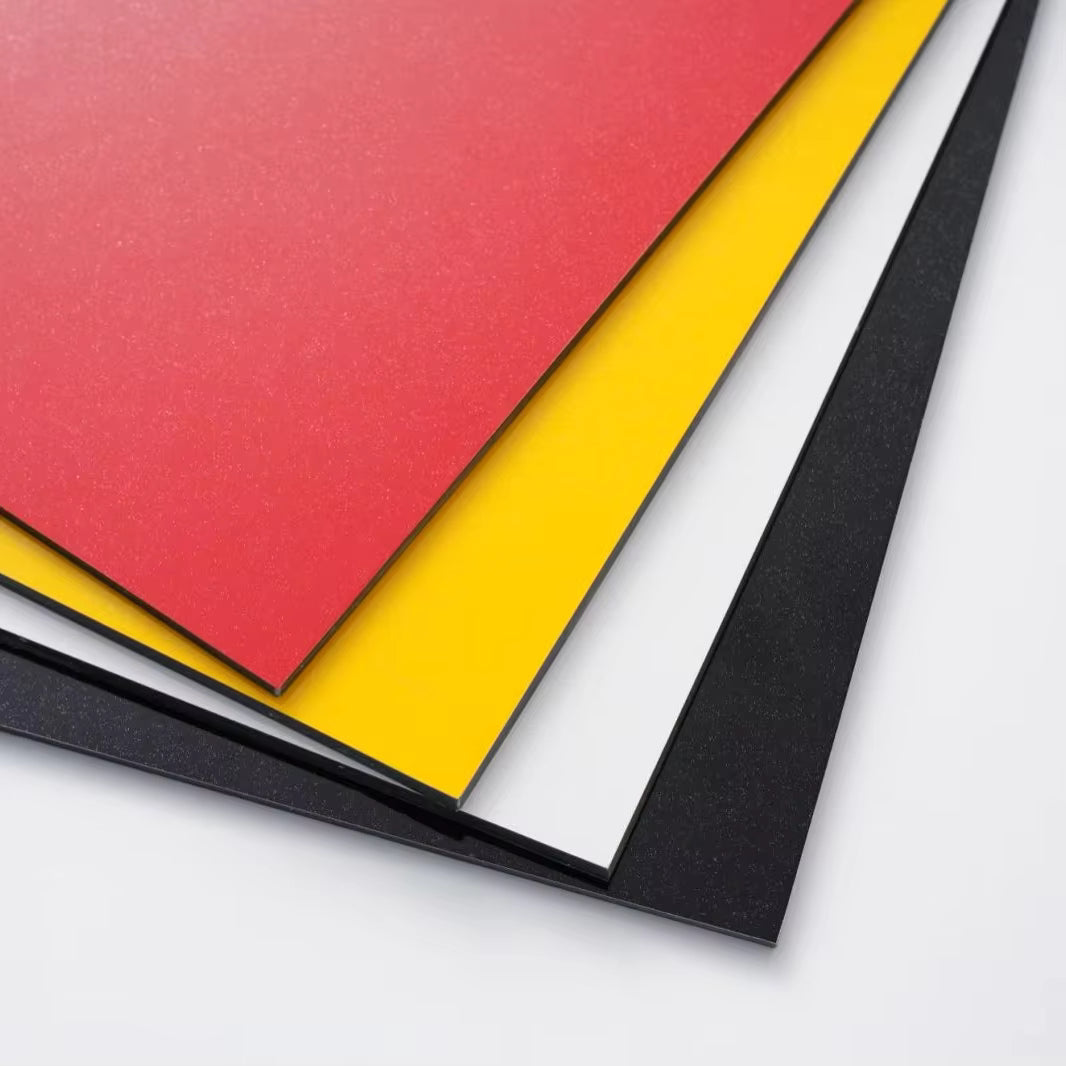
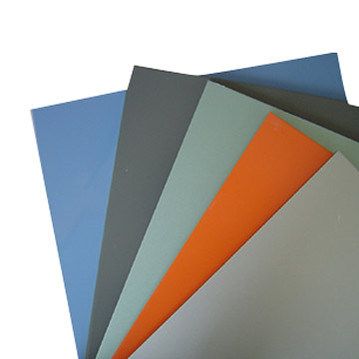
Color and Finish Strategy:
- Light colors: Expand visual space, increase light reflection
- Dark colors: Create intimate atmosphere, hide imperfections
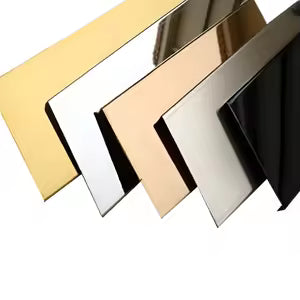
- Metallic finishes: Add luxury and sophistication
- Matte finishes: Reduce glare and fingerprint visibility
- Textured finishes: Hide minor surface imperfections
Integration with Architecture:
- Continuous systems: Extend from wall to ceiling for seamless appearance
- Transition details: Clean transitions between different materials
- Lighting integration: Coordinate with recessed and surface-mounted fixtures
- HVAC integration: Plan for air diffusers and return grilles
- Access panels: Concealed access for building systems
Floor Integration:
- Base details: Coordinate with flooring materials and base trim
- Moisture protection: Prevent water damage at floor level
- Cleaning considerations: Design for easy floor and wall cleaning
- Expansion joints: Accommodate building movement
- Damage protection: Protect lower portions from impact damage
Functional Requirements:
Durability Considerations:
- Traffic levels: High-traffic areas require more durable finishes
- Impact resistance: Consider protection in areas with equipment or furniture
- Maintenance access: Design for easy cleaning and maintenance
- Replacement capability: Plan for future panel replacement if needed
- Wear patterns: Anticipate and plan for normal wear locations
Environmental Performance:
- Moisture resistance: Suitable for humid environments like kitchens and bathrooms
- Temperature stability: Accommodates normal interior temperature variations
- Acoustic performance: Consider sound reflection and absorption requirements
- Fire safety: Ensure compliance with interior finish flame spread requirements
- Indoor air quality: Select low-emission materials and finishes
Code Compliance:
Fire Safety Requirements:
- Flame spread rating: Class A (0-25) required for most interior applications
- Smoke development: Class A (0-450) typically required
- Corridor restrictions: More stringent requirements in exit corridors
- Assembly occupancy: Special requirements for places of assembly
- High-rise buildings: Additional restrictions may apply
Accessibility Compliance:
- Protruding objects: Ensure profiles don't create accessibility hazards
- Visual contrast: Provide adequate contrast for visually impaired users
- Tactile considerations: Smooth transitions and appropriate textures
- Maintenance access: Ensure accessible maintenance procedures
- Emergency egress: Don't impede emergency exit routes
Lighting Design Integration:
Natural Light Interaction:
- Daylight reflection: Light finishes maximize daylight utilization
- Glare control: Matte finishes reduce unwanted glare
- Shadow patterns: Profile depth creates interesting shadow play
- Seasonal variation: Consider changing sun angles throughout year
- View preservation: Coordinate with window and view requirements
Artificial Lighting Design:
- Accent lighting: Highlight corrugated texture with grazing light
- General lighting: Ensure adequate illumination for space function
- Task lighting: Coordinate with specific work area requirements
- Emergency lighting: Ensure emergency lighting effectiveness
- Energy efficiency: Reflective finishes reduce lighting energy requirements
Installation Planning:
Substrate Requirements:
- Structural adequacy: Verify wall structure can support panel weight and loads
- Surface preparation: Level, clean, and properly prepared substrate
- Moisture control: Vapor barriers and moisture management as required
- Insulation coordination: Integrate with thermal insulation systems
- Utility coordination: Plan for electrical, plumbing, and HVAC systems
Panel Layout and Joints:
- Joint planning: Minimize visible joints through careful layout
- Expansion provision: Allow for thermal movement in large installations
- Module coordination: Coordinate panel sizes with room dimensions
- Symmetry considerations: Center panels or create balanced asymmetry
- Trim and edge details: Plan attractive edge and corner treatments
Special Applications:
Food Service Environments:
- Sanitary requirements: Smooth, cleanable surfaces required
- Chemical resistance: Resistance to cleaning chemicals and food acids
- Temperature resistance: Withstand kitchen heat and dishwasher steam
- Grease resistance: Easy cleaning of grease and food soils
- Code compliance: Meet health department requirements
Healthcare Applications:
- Infection control: Smooth, non-porous surfaces for easy disinfection
- Impact resistance: Resist damage from equipment and wheelchairs
- Chemical compatibility: Compatible with hospital-grade disinfectants
- Maintenance access: Easy cleaning and maintenance procedures
- Patient safety: No sharp edges or protruding elements
Educational Facilities:
- Durability: Withstand high-traffic and potential abuse
- Acoustic performance: Consider noise control requirements
- Safety: Impact resistance and no sharp edges
- Maintenance: Easy cleaning and repair procedures
- Vandalism resistance: Resist graffiti and intentional damage
How Do I Select the Right Profile and Finish for My Specific Interior Application?
Profile and finish selection depends on aesthetic goals, functional requirements, environmental conditions, and maintenance expectations:
Profile Selection Criteria:
Visual Impact Assessment:
- Subtle texture: Micro corrugated (1.6mm depth) for refined, understated appearance
- Moderate texture: Fine to Standard corrugated (3.2-4.8mm) for balanced visual interest
- Bold statement: Medium to Bold corrugated (9.5-19.1mm) for dramatic architectural impact
- Contemporary linear: Linear ribbed profiles for modern, clean-lined appearance
- Scale relationship: Profile depth should complement room size and architectural scale
Application-Specific Selection:
Residential Applications:
Living Areas: Fine corrugated (3.2mm) - elegant texture without overwhelming
Kitchens: Micro corrugated (1.6mm) - easy cleaning, subtle texture
Bathrooms: Micro to Fine corrugated - moisture resistance, cleanability
Accent Walls: Standard to Medium corrugated - create focal points
Basements: Any profile - industrial aesthetic often desired
Commercial Applications:
Offices: Fine to Standard corrugated - professional appearance
Retail: Medium to Bold corrugated - attract attention, create ambiance
Restaurants: Fine corrugated - balance aesthetics with cleanability
Hotels: Standard to Medium corrugated - upscale appearance
Lobbies: Bold corrugated - make strong first impression
Industrial Applications:
Manufacturing: Standard to Bold corrugated - durable, industrial aesthetic
Clean Rooms: Micro corrugated - smooth surfaces for cleanliness
Food Processing: Micro corrugated - sanitary, easy cleaning
Warehouses: Bold corrugated - cost-effective, durable
Laboratories: Fine corrugated - balance aesthetics with functionality
Finish Selection Matrix:Material Selection by Environment:
Standard Interior Environments:
- Carbon steel with paint: Most economical, suitable for normal interior conditions
- Pre-painted steel: Factory finish quality, wide color selection
- Aluminum with coating: Lightweight, corrosion-resistant, premium appearance
- Stainless steel: Premium durability, easy maintenance, modern aesthetic
High-Moisture Environments:
- Stainless steel 304: Excellent moisture resistance, food-grade applications
- Aluminum with marine coating: Corrosion resistance, lightweight
- Galvanized steel with epoxy: Cost-effective moisture resistance
- Pre-painted with moisture-resistant coating: Balance of cost and performance
High-Traffic Environments:
- Stainless steel with brushed finish: Hides scratches, easy maintenance
- Powder-coated steel: Superior durability and impact resistance
- Aluminum with hard anodizing: Excellent wear resistance
- Textured finishes: Hide minor damage and wear patterns
Coating System Selection:Performance Requirements:
Light Duty (Residential, Low Traffic):
- Polyester paint: 10-15 year life, good color retention
- Acrylic paint: 8-12 year life, easy touch-up
- Standard powder coat: 15-20 year life, good durability
Medium Duty (Commercial, Moderate Traffic):
- Polyurethane paint: 15-20 year life, excellent durability
- Premium powder coat: 20-25 year life, superior finish
- Anodized aluminum: 25+ year life, integral finish
Heavy Duty (Industrial, High Traffic):
- Epoxy coating: Chemical resistance, extreme durability
- Fluoropolymer coating: 25+ year life, easy cleaning
- Stainless steel: Minimal coating needed, permanent finish
Color Selection Guidelines:
Psychological Impact:
- Warm colors (reds, oranges, yellows): Create energy, intimacy, appetite stimulation
- Cool colors (blues, greens, purples): Promote calm, focus, productivity
- Neutral colors (grays, beiges, whites): Timeless, flexible, professional
- Dark colors: Create drama, hide imperfections, intimate atmosphere
- Light colors: Expand space, increase brightness, clean appearance
Practical Considerations:
- Maintenance visibility: Light colors show dirt more readily
- Fingerprint resistance: Matte finishes hide fingerprints better than gloss
- Scratch visibility: Darker colors may show scratches more prominently
- Color coordination: Consider coordination with other interior finishes
- Lighting interaction: Colors appear different under various lighting conditions
Texture and Pattern Options:
Surface Texture Selection:
- Smooth finishes: Easy cleaning, formal appearance, show imperfections
- Orange peel texture: Hide minor imperfections, reduce glare
- Hammer tone: Distinctive appearance, excellent imperfection hiding
- Wood grain: Natural appearance, warm aesthetic
- Stone texture: Architectural interest, sophisticated appearance
Pattern Coordination:
- Horizontal installation: Emphasizes width, contemporary appearance
- Vertical installation: Emphasizes height, traditional appearance
- Mixed orientation: Creative design opportunities, requires careful planning
- Panel size variation: Create visual interest through size variation
- Color variation: Subtle color changes create depth and interest
Specialty Finish Considerations:
Antimicrobial Finishes:
- Copper-based coatings: Natural antimicrobial properties
- Silver ion technology: Long-lasting antimicrobial action
- Photocatalytic coatings: Self-cleaning and air-purifying properties
- Applications: Healthcare, food service, high-touch areas
- Certification: EPA registration for antimicrobial claims
Acoustic Finishes:
- Perforated panels: Sound absorption when backed with insulation
- Micro-perforated systems: High-frequency sound absorption
- Resonant cavity systems: Tuned for specific frequency ranges
- NRC ratings: 0.60-0.85 achievable with proper backing systems
- Applications: Conference rooms, restaurants, open offices
Sustainable Finish Options:
- Low-VOC coatings: Improved indoor air quality
- Recycled content: High recycled content materials
- Cradle-to-cradle certified: Comprehensive sustainability certification
- Local sourcing: Reduced transportation environmental impact
- End-of-life recyclability: 100% recyclable materials
Cost Optimization Strategies:
Value Engineering:
- Standard colors: Significant cost savings over custom colors
- Standard profiles: Lower cost than custom profile development
- Larger panels: Reduce installation labor and joint sealing
- Simple mounting: Direct screw mounting most economical
- Local suppliers: Reduce transportation costs and delivery time
Quality Assurance:
- Sample approval: Always approve samples under actual lighting conditions
- Mock-up installation: Large projects benefit from mock-up sections
- Color consistency: Verify color matching between production lots
- Installation standards: Follow manufacturer installation guidelines
- Professional installation: Use experienced installers for best results
What Are the Installation Methods and Mounting Systems Available?
Interior corrugated metal panels offer multiple installation methods, each with specific advantages for different applications and substrate conditions:
Direct Screw Mounting System:
System Overview:
- Method: Panels attached directly to substrate with visible fasteners
- Advantages: Simple installation, lowest cost, easy panel replacement
- Disadvantages: Visible fasteners, potential thermal bridging
- Best applications: Utility areas, industrial spaces, budget-conscious projects
- Typical cost: $8-15/m² installed (including labor)
Installation Process:
- Layout and marking: Establish level reference lines and panel locations
- Substrate preparation: Ensure clean, level, structurally adequate surface
- Panel positioning: Position first panel using reference lines
- Fastener installation: Install fasteners at specified spacing and locations
- Subsequent panels: Install remaining panels with proper overlap or butting
- Trim installation: Install edge trim and corner pieces for finished appearance
- Quality inspection: Verify alignment, fastener tightness, and overall appearance
Fastener Specifications:
- Screw type: Self-drilling or self-tapping screws with decorative caps
- Length: 25-40mm depending on substrate and panel thickness
- Spacing: 300-400mm centers in both directions
- Edge distance: 25mm minimum from panel edges
- Torque: 2-4 Nm to compress washer without over-driving
- Materials: Stainless steel or coated steel to prevent corrosion
Substrate Requirements:
- Wood framing: 19mm minimum thickness, properly seasoned lumber
- Steel framing: 16-20 gauge minimum, adequate fastener penetration
- Concrete/masonry: Use appropriate anchors, verify pull-out capacity
- Drywall: Requires backing or toggle anchors for adequate support
- Existing walls: Verify structural adequacy and surface preparation
Concealed Clip Mounting System:System Overview:
- Method: Hidden clips secure panels without visible fasteners
- Advantages: Clean appearance, easy panel removal, thermal break capability
- Disadvantages: Higher cost, requires precise installation
- Best applications: Architectural spaces, high-end commercial, accessible areas
- Typical cost: $18-28/m² installed (including clips and labor)
Clip System Components:
- Wall clips: Attach to substrate at specified spacing
- Panel clips: Integrated into or attached to panel edges
- Engagement mechanism: Clips interlock to secure panels
- Adjustment capability: ±10mm adjustment for installation tolerances
- Load capacity: 1.2-2.0 kN/m² depending on clip design
Installation Sequence:
- Clip layout: Mark clip locations on substrate per manufacturer specifications
- Wall clip installation: Secure clips to substrate with appropriate fasteners
- Panel preparation: Install panel clips or verify factory installation
- Panel engagement: Engage panels with wall clips, verify secure attachment
- Alignment verification: Check panel alignment and make adjustments
- System completion: Install trim pieces and complete installation
Clip Spacing Requirements:
Standard Clip Spacing:
- Vertical spacing: 400-600mm centers
- Horizontal spacing: Panel width (typically 1000mm)
- Edge support: Additional clips within 150mm of panel edges
- Load points: Extra clips at anticipated load locations
- Seismic areas: Reduced spacing per seismic requirements
Rail Mounting System:
System Overview:
- Method: Continuous rails support panels with maximum flexibility
- Advantages: Easy reconfiguration, excellent access, superior load distribution
- Disadvantages: Highest cost, requires precise rail installation
- Best applications: Demountable partitions, equipment access areas, future flexibility needs
- Typical cost: $25-40/m² installed (including rails and hardware)
Rail System Components:
- Horizontal rails: Continuous support members attached to substrate
- Vertical rails: Optional vertical members for enhanced support
- Panel connectors: Hardware connecting panels to rail system
- Adjustment mechanisms: Allow fine-tuning of panel position
- Access hardware: Quick-release mechanisms for panel removal
Rail Installation Process:
- Rail layout: Establish level lines for rail installation
- Rail mounting: Secure rails to substrate with structural fasteners
- Rail alignment: Verify rails are level, plumb, and properly spaced
- Panel installation: Install panels into rail system per manufacturer instructions
- System adjustment: Fine-tune panel alignment and spacing
- Completion: Install end caps, trim pieces, and access hardware
Load Distribution Benefits:
- Point loads: Rails distribute concentrated loads over larger areas
- Thermal movement: Rails accommodate panel expansion and contraction
- Structural flexibility: System accommodates building movement
- Future modifications: Easy reconfiguration for changing needs
- Maintenance access: Panels easily removed for behind-wall access
Adhesive Mounting System:
System Overview:
- Method: Structural adhesives bond panels directly to substrate
- Advantages: Completely concealed attachment, smooth appearance, no thermal bridging
- Disadvantages: Permanent installation, substrate limitations, environmental sensitivity
- Best applications: Smooth substrates, architectural features, clean-room environments
- Typical cost: $12-22/m² installed (including adhesive and labor)
Adhesive Selection:
- Structural acrylics: High strength, good temperature resistance
- Polyurethanes: Flexible, good for dissimilar materials
- Epoxies: Maximum strength, chemical resistance
- Hybrid systems: Combine multiple adhesive technologies
- Environmental ratings: Consider temperature, humidity, and chemical exposure
Substrate Requirements:
- Surface preparation: Clean, dry, properly prepared surface essential
- Substrate materials: Concrete, drywall, painted surfaces, existing panels
- Surface texture: Smooth to moderately textured surfaces acceptable
- Contamination: Oil, dust, and moisture must be completely removed
- Primer requirements: Some substrates require primer for proper adhesion
Installation Process:
- Surface preparation: Clean and prepare substrate per adhesive manufacturer requirements
- Adhesive application: Apply adhesive in specified pattern and thickness
- Panel positioning: Position panel accurately - limited adjustment time
- Pressure application: Apply uniform pressure for specified time period
- Cure time: Allow full cure before subjecting to loads
- Quality verification: Test adhesion at sample locations
Limitations and Considerations:
- Removal difficulty: Panels difficult to remove without damage
- Weight limits: Maximum 0.5 kN/m² for most adhesive systems
- Temperature sensitivity: Adhesive performance varies with temperature
- Humidity effects: High humidity can affect adhesive cure and performance
- Long-term durability: Some adhesives may degrade over time
Hybrid Mounting Systems:
Mechanical-Adhesive Combination:
- Primary attachment: Mechanical fasteners provide primary support
- Secondary bonding: Adhesive provides additional attachment and sealing
- Advantages: Redundant attachment, improved performance
- Applications: Critical applications, high-load areas, seismic zones
- Installation: Combine mechanical and adhesive installation procedures
Clip-Rail Combination:
- Horizontal rails: Provide primary support and load distribution
- Concealed clips: Secure panels to rails with hidden attachment
- Advantages: Maximum flexibility with clean appearance
- Applications: High-end architectural, demountable systems
- Cost premium: 15-25% over individual systems
Installation Tools and Equipment:
Basic Tools Required:
- Measuring tools: Tape measure, level, chalk line, square
- Cutting tools: Metal shears, circular saw with metal blade, plasma cutter
- Drilling tools: Drill/driver, various drill bits, hole saws
- Fastening tools: Screw guns, impact drivers, torque-limiting drivers
- Safety equipment: Safety glasses, gloves, hard hats, fall protection
Specialized Equipment:
- Panel lifts: Vacuum lifts or mechanical lifts for large panels
- Cutting tables: Support tables for accurate panel cutting
- Bending equipment: Panel benders for field modifications
- Measuring devices: Laser levels, digital measuring tools
- Quality control: Torque wrenches, pull-test equipment
Installation Quality Control:
Pre-Installation Checklist:
- Material inspection: Verify panel specifications, finish quality, quantities
- Substrate verification: Confirm structural adequacy and surface preparation
- Layout verification: Check dimensions, square, level, and plumb
- Tool calibration: Verify tool settings and calibration
- Weather conditions: Confirm suitable installation conditions
During Installation:
- Alignment monitoring: Continuous checking of panel alignment
- Fastener inspection: Verify proper installation and torque
- Gap consistency: Maintain consistent gaps between panels
- Trim coordination: Ensure proper fit with trim and accessories
- Progress documentation: Photo documentation of installation progress
Post-Installation Verification:
- Final alignment: Overall system alignment and appearance
- Fastener verification: Sample testing of fastener installation
- Functionality testing: Test removable panels and access features
- Cleaning: Remove installation debris and protective films
- Documentation: Provide installation drawings and maintenance instructions
Common Installation Issues:
Alignment Problems:
- Cause: Poor substrate preparation, inadequate layout
- Prevention: Careful layout, quality substrate preparation
- Correction: Adjustment within system tolerances, trim coordination
Fastener Issues:
- Over-driving: Damages panels and reduces holding power
- Under-driving: Inadequate attachment and potential failure
- Prevention: Proper tool settings, installer training
- Correction: Fastener replacement, additional fasteners as needed
Panel Damage:
- Handling damage: Scratches, dents during installation
- Cutting damage: Poor cuts, burrs, coating damage
- Prevention: Proper handling procedures, sharp cutting tools
- Correction: Touch-up paint, panel replacement if severe
Thermal Movement Issues:
- Inadequate provision: Buckling, fastener failure
- Over-provision: Excessive gaps, appearance problems
- Prevention: Proper thermal analysis and design
- Correction: System modification, expansion joint installation
What Are the Maintenance Requirements and Cleaning Procedures for Interior Applications?
Interior corrugated metal panels require minimal maintenance when properly installed, but regular cleaning and inspection ensure optimal appearance and performance throughout their service life:
Routine Maintenance Schedule:
Daily Maintenance (High-Traffic Areas):
- Spot cleaning: Remove fingerprints, smudges, and minor soiling
- Damage inspection: Check for impact damage or loose panels
- Safety verification: Ensure no sharp edges or protruding elements
- Housekeeping: Remove debris from corrugation valleys
- Documentation: Note any issues requiring attention
Weekly Maintenance (Standard Commercial):
- General cleaning: Dust removal and light cleaning as needed
- High-touch areas: Clean frequently touched surfaces
- Joint inspection: Check sealant and trim condition
- Fastener check: Verify visible fasteners remain tight
- Overall appearance: Assess general condition and cleanliness
Monthly Maintenance (All Applications):
- Detailed cleaning: Comprehensive cleaning of all surfaces
- System inspection: Check mounting system integrity
- Trim condition: Inspect edge trim and corner pieces
- Access verification: Test removable panels and access features
- Maintenance log: Update maintenance records and schedules
Annual Maintenance:
- Professional inspection: Qualified technician assessment
- Deep cleaning: Professional cleaning with specialized equipment
- System testing: Load testing of mounting systems if required
- Preventive repairs: Address minor issues before they become major problems
- Warranty compliance: Ensure maintenance meets warranty requirements
Cleaning Procedures by Application:
Standard Commercial Cleaning:
Daily Cleaning Process:
- Dust removal: Use microfiber cloths or soft-bristle brushes
- Spot cleaning: Mild detergent solution for localized soiling
- Rinse: Clean water rinse to remove detergent residue
- Dry: Soft cloths or air drying to prevent water spots
- Inspection: Check for areas requiring additional attention
Weekly Deep Cleaning:
- Pre-cleaning: Remove loose debris and dust
- Detergent application: Apply appropriate cleaning solution
- Dwell time: Allow 5-10 minutes for soil dissolution
- Agitation: Soft brushes for stubborn soils (follow corrugation direction)
- Rinse: Thorough rinse with clean water
- Dry: Complete drying to prevent water spots and mineral deposits
Food Service Environment Cleaning:
Sanitary Cleaning Requirements:
- Frequency: Multiple times daily in food preparation areas
- Cleaning agents: Food-safe, sanitizer-approved products
- Temperature: Hot water (60-80°C) for grease removal
- Contact time: Minimum contact time for sanitizer effectiveness
- Documentation: Cleaning logs required by health departments
Three-Sink Method Adaptation:
- Wash: Hot soapy water to remove soil and grease
- Rinse: Clean hot water to remove soap residue
- Sanitize: Approved sanitizer solution at proper concentration
- Air dry: Allow complete air drying before use
- Verification: Test sanitizer concentration regularly
Specialized Food Service Cleaning:
- Grease removal: Steam cleaning for heavy grease buildup
- Sanitizer compatibility: Verify cleaning chemicals won't damage finish
- HACCP compliance: Follow Hazard Analysis Critical Control Points procedures
- Inspector requirements: Meet local health department standards
- Staff training: Proper cleaning technique training for food service staff
Healthcare Environment Cleaning:
Infection Control Procedures:
- Disinfectant selection: EPA-registered hospital-grade disinfectants
- Contact time: Follow manufacturer's specified contact time
- Frequency: Multiple times daily, immediately after contamination
- Personal protection: Appropriate PPE for cleaning staff
- Validation: Periodic testing to verify disinfection effectiveness
Terminal Cleaning Process:
- Pre-cleaning: Remove visible soil and debris
- Disinfectant application: Apply EPA-registered disinfectant
- Contact time: Maintain wet contact per label requirements
- Rinse: If required by disinfectant label
- Documentation: Record cleaning and disinfection activities
Chemical Compatibility:
- Quaternary ammonium: Generally safe for most metal finishes
- Phenolic compounds: May discolor some finishes over time
- Bleach solutions: Can cause corrosion and finish damage
- Alcohol-based: Generally safe, evaporates quickly
- Hydrogen peroxide: Effective disinfectant, generally finish-safe
Maintenance by Material Type:
Painted Steel Surfaces:Routine Care:
- Cleaning frequency: Weekly to monthly depending on environment
- Cleaning agents: Mild detergents, avoid abrasive cleaners
- Technique: Soft cloths, follow corrugation direction
- Damage prevention: Avoid impact and sharp objects
- Touch-up: Address scratches and chips promptly
Long-term Maintenance:
- Coating inspection: Annual assessment of coating condition
- Touch-up painting: 5-10 year intervals for high-wear areas
- Complete recoating: 15-25 years depending on coating system
- Surface preparation: Proper preparation essential for recoating success
- Professional application: Use qualified painters for major work
Stainless Steel Surfaces:
Daily Maintenance:
- Fingerprint removal: Frequent cleaning with appropriate products
- Water spot prevention: Dry surfaces after cleaning
- Grain direction: Clean parallel to grain direction when present
- Avoid chlorides: Don't use chloride-containing cleaners
- Immediate attention: Clean spills and stains immediately
Specialized Stainless Cleaning:
- Stainless steel cleaners: Commercial products designed for stainless steel
- Polishing compounds: Restore luster to brushed finishes
- Passivation: Periodic treatment to restore corrosion resistance
- Avoid abrasives: Steel wool and abrasive pads can damage surface
- Professional restoration: Severe damage may require professional refinishing
Aluminum Surfaces:
Cleaning Considerations:
- pH sensitivity: Avoid strongly alkaline or acidic cleaners
- Oxidation prevention: Regular cleaning prevents oxidation buildup
- Anodized surfaces: Special care for anodized finishes
- Polishing: Occasional polishing for mill finish aluminum
- Corrosion prevention: Address any signs of corrosion immediately
Anodized Aluminum Care:
- Gentle cleaning: Mild detergents and soft cloths only
- Avoid abrasion: Anodized layer can be damaged by abrasives
- Sealant renewal: Periodic sealing may be beneficial
- Color protection: UV protection for colored anodized surfaces
- Professional assessment: Annual inspection by qualified technician
Problem Diagnosis and Solutions:
Common Issues and Remedies:
Water Staining:
- Cause: Mineral deposits from hard water, poor drying
- Prevention: Immediate drying after cleaning, water softening
- Removal: Mild acid cleaners (vinegar solution), rinse thoroughly
- Severe cases: Commercial mineral deposit removers
- Prevention: Install water softening systems in hard water areas
Fingerprint Accumulation:
- Cause: Natural skin oils, high-touch surfaces
- Prevention: Antimicrobial coatings, regular cleaning schedules
- Removal: Alcohol-based cleaners, microfiber cloths
- Reduction: Matte finishes show fingerprints less than gloss finishes
- Design solution: Locate panels to minimize touching
Scratches and Scuffs:
- Cause: Impact from furniture, equipment, or cleaning tools
- Prevention: Protective measures in high-risk areas
- Minor scratches: Touch-up paint, polishing compounds
- Deep scratches: Professional repair or panel replacement
- Design prevention: Protective wainscoting or guards in vulnerable areas
Coating Degradation:
- Cause: UV exposure, chemical exposure, normal aging
- Early signs: Chalking, color fading, loss of gloss
- Assessment: Professional coating evaluation
- Treatment: Cleaning, touch-up, or complete recoating
- Prevention: Regular maintenance, appropriate material selection
Corrosion Issues:
- Cause: Moisture, chemical exposure, galvanic action
- Early detection: Regular inspection for rust spots
- Treatment: Clean, treat, and protect affected areas
- Prevention: Proper material selection, moisture control
- Professional help: Severe corrosion requires professional assessment